Note that rebuilt window motors vary in cost depending on the quality of the core they were based on. If you want to see the differences, go to PartsTrain.com.
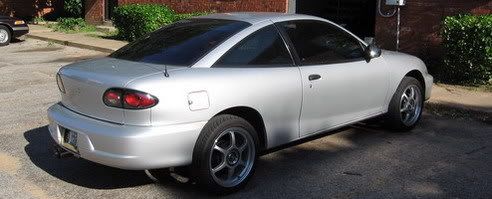
I just replaced both of the motors on my 98 Sunfire convertible using upper but not top of the line rebuilds from that site (item ##A182144), they're at:
http://www2.partstrain.com/products/Engine/Body_Mechanical_&_Trim/Window_Motor/1998~PONTIAC~SUNFIRE~4~2-dot-4~SUNF--002.html
They ran around $52 each, and that included a refundable $12.82 core charge). There are other threads touching on the work involved in a replacement, but here's a detailed real-world walkthrough.
- Remove inner door panel.
- remove water shield.
- lower window all the way (if it isn't already down). Unscrew the two bolts securing it to the regulator, and slide it up about 2/3 of the way. Slap 3-4 pieces of heavy-duty duct tape onto the inside bottom of the glass and then pull them up and over the inside lip of the door top.
- Here's the fun part: remove rivets. The motor/regulator assembly is held on by two bolts and total of eight rivets (five holding assembly on the door, three more securing motor to regulator).
In addition, one of the rivets holding the assembly to the door is obscured by a bracket that the armrest screws go into, and that bracket is held on by three rivets. That bracket has to be removed to get access to the rivet head it is obscuring. In addition, there is a bracket on the end of the motor that has to be removed once you get it off the regulator. So you have to drill out a total of eight rivets to get the motor/regulator assembly out of the door, and another five once you can work on it outside the car.
What is the best tool for this phase of the repair? I don't even want to go there - aftermarket manuals recommend a 3/16 drill bit, but I (and others) have found that only causes the rivet to spin. I ended up using a combination of 3/16 and 1/4 carbon graphite tipped drill bits and a dremel with a cutting disc, and had to attack each rivet on a "case by case" basis. Some came out quickly, some were SOBs.
Once you have the rivets out, carefully shoehorn the whole motor/regulator assembly out of the rear door access hole. You want to avoid bending anything.
Once you have the regulator/motor assembly out of the car, do NOT remove the motor yet. Repeat,
DO NOT.
First drill a 1/4 hole between the half-moon shaped gear on the regulator and the backplate below it (drill the hole at least 1/2 inch from the edge of that gear). Insert a 1/4 inch bolt (1.5 inch length is a good size) through the hole, and firmly secure a bolt at the end. This is to prevent the greasy, sharp-edged ,spring-tensioned regulator assembly from snapping at you like a whipsaw when you remove the motor (normally, the gearbox on the motor is what holds the spring tension in place).
Once -- and ONLY once -- that bolt is in place,
then drill out the three rivets secuding the motor. Remove it from the regulator, then drill out the two rivets holding the bracket on the end.
Using BOLTS, attach the replacement motor to the regulator. Use lock washers and tighten securely.
Also use bolts and lock washers to attach the previously removed end bracket to the new motor.
Remove the 1/4 bolt securing the gear on the regulator.
Grease up the whole assembly with white lithium grease. Now is also a good time to do the same to the window tracks in the door.
Carefully shoehorn the repaired assembly back into the door.
Secure it using 1/4 by 1/2 long bolts and lock washers. Getting the washers and nuts (which go on the inside of the door) onto the bolts can be tricky; I sped things up as follows:
Use white glue to glue the lock washers to to the nuts. Let them dry for at last a half hour
Take a small narrow piece of thin cardboard (about an inch wide and three inches long) and secure some duct tape with the adhesive side out to the bottom 1/2 inch of it. You now have a DIY "bolt hole fishing" tool.
Then push a glued nut washer assembly (washer side out) to the sticky bottom of your new fishing tool. It can then be maneuvered ("fished" ) down in to the little narrow areas inside the door where the regulator holes line up with the holes you previously drilled the rivets out of. Trust me, this process sounds quirky but will save you a
lot of grief.
When you fish a nut/washer unit to line up with a hole, quickly stick the bolt in and turn it until it grabs the nut. Keep turning until it pulls the nut of fthe fishing tool. Because of the lock washer, you can then torque it down with a screwdriver. Get it nice and tight.
Do the same thing to reattach the armrest bracket.. The bottom left hole on it is a real bitch (in terms of fishing a nut/washer unit), I just left that open (the bracket is quite secure with just two bolts).
Re-attach window to regulator. Then re-bolt the upper slider of the regulator to the rear door access hole. Then plug the power connector into the motor and test. Assuming everything works (unless you really bent up the regulator while getting it into and/or out of the door it should), reattach the moisture shield and inner door panel.
Voila - problem resolved. Yes, it's a pain in the you-know-what job requiring at least a few hours per door, but you just saved anywhere from $400-$700 in dealer repair charges. Plus, if the replacement motor or regulator assembly ever craps out, swapping in a new one will be 100 times easier because those damn GM--wants-to-deter-you-from-repairing -your-own -car rivets are now gone.


