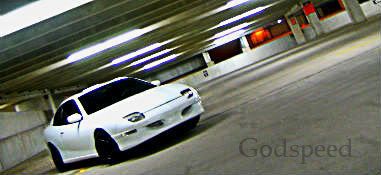
Alright guys here it is.. the revised and updated ecotec swap how-to.
This is the first part thats going to be a large source of information for swapping an eco into a 3rd gen jbody. This first installment covers the 2000-2002 year range and will include pictures. As information is posted, the sticky will be updated and altered to reflect additional information.
How to swap an L61 ecotec into your 2000-2002 jbody
there's two paths to follow when doing your swap.
One is easier and lets you buy parts in bulk which is usually if not always cheaper.. this is called a K-frame drop out. The K frame is basically the entire front subframe which includes the front suspension, the engine, and the transmission and all the accessories, hoses, and misc stuff you may need.
the other way is to pick the parts up peice by peice.. which on a budget may be easier to swallow, but usually ends up costing more. However, I like this method better because it gives you the opportunity to do some substantial upgrades while the car and the drivetrain components are disassembled.
what you need (bare minimum)
-Ecotec engine with all accessories, wiring harness, and ECU (k)
-Ecotec transmission (whether auto or 5 speed) (k)
-Ecotec radiator*
-Ecotec upper motor mount*
-Ecotec upper radiator hose
-Ecotec exhaust manifold and cat assembly
extras that are a GOOD idea to have
-Ecotec fuel return line
-Ecotec lower radiator hose*
-Ecotec throttle cable#
* 2.4 swappers may not have to change these parts, however for 2200 OHV swappers it will be required
# for the OHV this is not necessary, but is a good idea.. 2.4 swappers can use their throttle cable since its almost identical to the ecotec throttle cable
(k) usually included in a k-frame drop out
Picking an engine:
Most junkyards offer some kind of return policy garaunteeing their engines to function properly or your money back, or in house credit, or an even swap for another engine.
However, be sure to visually inspect the engine when you pick it up so hopefully you won't have to excersize that garauntee. Check the block for cracks and damage. Make sure the wiring harness is intact and complete (junkyards like to cut things like this when removing engines).
Also check you're getting everything you paid for. When you get the engine home, pull the IDI cover and the spark plugs and peek inside the combustion chambers for debris other than typical carbon build up. 9 times out of 10, your ecotec will be in good working condition since a majority of them are still young due to the fact that they've only been available for jbodies since 2002.
*skwirl's personal suggestion: get an 03' ecotec engine or higher.. they had the revised fuel rail and are less known to snap connecting rods under boost (they blow ringlands instead..a substantial failure, but more survivable than a connecting rod failure)
During the procedure, you may find that some OEM equipment carries a high price tag. To solve this problem, feel free to excersize the Jbody aftermarket.
Also, upgrading the car during the dissassembly for the motor swap is a good idea.
suggested modifications:
-flywheel and clutch / torque converter
-motor mounts / trans mounts
-a-arm bushings
-intake
-exhaust
Ok, you think you have everything you need? Well grab a friend and lets get this swap going. Plan on spending at least a weekend to do the swap from start to finish. Have a backup plan in case you hit a snag and have to order a part that has a 2 week lead time. The swap is not difficult at all, but there's a lot to take care of and all the planning in the world can get screwed up very easily.
But before we get this show on the road...
PRE-SWAP MINI FAQ
1)
"what do I need to swap an ecotec into my 200X jbody?"
see the section above titled 'what you need('bare minimum')
2)
"do i have to get my transmission mount welded/modified?"
as far as I know, for 00-02 jbodies, if you stick with the same transmission (manual to manual or auto to auto) no, you do not have to have this modified in any way. The jury is still out for auto to manual conversions.. anyone with information feel free to chime in.
3)
"do i need to buy a new transmission?"
yes, you need an ecotec transmission, no other bolt pattern will fit
Procedure:
This is the engine swap procedure from start to finish as best as I can remember it. I'll add pictures where i can, and elaborate as questions arise on particular steps.This is a basic list, and is not all inclusive. A medium amount of mechanical aptitude, as well as access to a variety of hand tools, an engine hoist/cheery picker, numerous jacks and jackstands is all required to complete this swap. Its not difficult as far as motor swaps go since the car in these years is designed to accept the engine, however its not overly simple either.
PREP
1) put the car where the swap is to take place. make sure its safe and secure as it will probably sit there for a minimum of 48 hours in an excessively disassembled state.
2) start the engine, and pull the fuel pump relay under the hood. This kills the engine, and relieves any residual fuel pressure in the fuel injection system. Afterwards, remainder pressure will bleed off relatively fast and by the time you're ready to remove the engine, fuel press. will not be an issue.
3) drain all fluids.. coolant, oil, PS pump, transmission fluid.
4)break the lugnuts on the front wheels loose, then jack the car up on all 4s. Get about a foot off the ground, you'll need plenty of clearance when working on the exhaust
5) take off the hood and store in safe place (on the roof with a blanket underneath it is a good place)
DISSASSEMBLY
(note; since this can be either a 2.4 or a 2200OHV please use applicable steps where necessary. Remember this guide is basic, you need a fundamental knowledge of your engine and how to disassemble these parts before continuing with your swap)
6) remove the battery
7) remove both front wheels
8) remove the inner fender liners on both front wheels
9) remove the serpentine drive belt
10)remove the intake
11)remove the exhaust manifold and exhaust pipe up to and including the cat converter.
12) disconnect the main engine wiring harness and external connections such as radiator hoses, heater hoses, fuel lines(special GM tool recommended sold in most auto stores)...
***ALSO.. for the OHV, you can cut the return line as close as you can to the rail, and use a fuel injection clamp to hold it onto the eco fuel rail until you get an eco fuel hose***
...cables, and vacuum lines. This includes the fuse box under the hood, and the factory ecu. Also, the engine to body interface plug must also be disconnected. There's a bolt in the center of it that must be loosened before it will unplug. Make sure to undo that first, or else you'll break this very important peice. Take note of the position of the heater hoses (the two big rubber hoses near the middle of the firewall) they do go in a particular position).
NOTE: don't waste your time taking off things self contained on the engine/trans since its all coming out together as one unit anyway.
13) disconnect the a/c compressor from the engine, and disconnect the lines from the compressor (CAUTION! a/c compressor has pressurized lines going to it with, and upon disconnection WILL spew out this crap everywhere. Be sure to use a well ventilated area, and the low pressure side of the system).
14) Once you have all the hoses, throttle cable, wiring, and everything disconnected, make sure to zip tie them somehow or drape them over the engine. You want everything to come out together nicely, and not hang up on anything. Leaving it like spaghetti everywhere will only complicate things when the engine comes out.
15) Disconnect the driveshaft nuts. If you have trouble breaking them loose, have a friend step on the brakes or use a screwdriver in the brake vanes to hold the rotor in place so you can loosen the nuts. Use a breaker bar and a lot of balls, these nuts are tough.
16) With both driveshaft nuts off, take out the 2 nuts and 1 screw on the strut mounts. This will let you drop the suspension in the front and sneak the driveshafts out of place without messing up your alignment. If you're upgrading the a-arm bushings, remove the a-arms. Use mechanic's wire or similar to hold the knuckle assemblies in place so nothing gets accidently broken. If upgrading to coilovers, you must remove the strut assemblies. If installing a front sway bar, removal of the K-frame is necessary and should be done once the engine and transmission is out of the car.
17) sneak the driveshafts out of the wheel hubs. Use a hammer and tap them on the end to get them going. Use muscle to get them around the hub. Sometimes disconnecting the brake line makes it easier. Once you get the driveshaft out of the wheel hub, use a prybar or large screwdriver to get the other end out of the differential on the transmission. Just put it inbetween the diff and the end of the driveshaft and pry and it should pop right out.
18) Almost time to say goodbye to your old motor. Move the cherry picker into place and secure the top of the engine with a chain. Place some force on the bottom of the transmission with a floor jack. Remove the motor mounts and transmission mounts. Drop the floor jack down until the motor is suspended by the cherry picker only.
NOTE: remove the transmission mounts from the transmission as well... having the extra space will make removing the drivetrain a lot easier. These will be re-used so keep them safe.
19) Now the only thing keeping your motor in is the cherry picker. Time to get it out of there. Have a friend or two spot on both sides of the motor and SLOWLY raise it up with the cherry picker. If it gets caught STOP and see where its hanging up. Remember, the largest and heaviest part of the entire car is being lifted out of it.. knocking the car off the jackstands is a risk so be careful. As the engine and transmission come up together, tilt the transmission downwards and the engine upwards. Be careful of the brake distributor as the hardlines are directly in the line of fire.
20) Now take a break and place your old motor in a safe spot, or in the closest wheel barrow.
INSTALL
21) before we put the ecotec in, remove the old radiator and install the ecotec radiator. there will be coolant still in there so watch out.
22) get your ecotec ready by putting the wiring harness on (if necessary). Most of the plugs are color coded, and only plug into their mate which makes mis-wiring very difficult. I started at the ignition module and worked my way around. Bolt the engine up its transmission (if necessary) as well as bolting on all of the accessories (PS, a/c, alt) a new serpentine belt wouldn't hurt, as well as new spark plugs.
NOTE: If you need bolts to fasten the eco and getrag together, you can use the ones holding your old engine together, they're the same size... this goes for the motor mount bolts too.
23)hoist the eco and getrag up on the cherry picker. Remember, we want the transmission to dip down to clear the brake lines and booster. keep those friends around for spotting/ man-handling duties. Be careful on re-install, follow the same SLOW procedure and if you find the motor getting stuck, see what its hung up on.
24) with the engine in place, jack up the trans from underneath to get the drivetrain into position. Reinstall the motor mounts and transmission mounts. You'll find the transmission mounts may have to be turned upside down, but they will work for the ecotec transmission.
25) reinstall the driveshafts.. putting them into the differential is usually easiest. You should hear them or feel them snap into place. Tap lightly on the inner CV joint until they're just about flush with the differential.
26) reassemble your suspension. put the nuts back on the driveshafts and tighten them.
27) hook up the ecotec exhaust components and mate them up to your existing catback (OEM or aftermarket) system. Don't forget to install and plug in the O2 sensors (MAKE SURE YOU PLUG THEM IN TO THE RIGHT PLUG!!)
28) now the fun part.. the hoses, cables and wiring need to all be reconnected. take your time and make sure everything is connected properly. Fuel lines, heater hoses, radiator hoses, body-engine interface plug, wheel speed sensors, coolant level, coolant temp, etc etc
NOTE:Check your throttle linkage, I noticed with my 2200 swap that pushing my gas pedal down all the way did not open the throttle all the way. A zip tie behind the cable on the pedal acting as a spacer is a temporary fix, but upgrading to the ecotec throttle cable during the swap is ideal
29) with everything reconnected on the engine, fill it up with fluids. Use regular oil in it for the first 100miles or so as well as a new filter. Fill the trans up with fluid as well, and fill the cooling system. If you have a driveshaft not in place, you'll see the trans fluid leak out when the engine starts or as you pour it in. Also gap and install the new spark plugs. Put the battery back in place and hook it up.
FINALE
30) make sure your fuel pump fuse is in place. turn the key but DO NOT TURN THE ENGINE OVER YET. the fuel pump will prime, and this is the time to check for any fuel line leaks. Turn the key on and off a few times to let the pump prime pressure. If you have any leaks, stop and fix them before continuing as this poses a major fire hazard.
31) the moment of truth. remove the fuel pump fuse, Turn the key and attempt to start the engine. It should crank over easily but not start (since it doesn't have fuel). At this point its time to do the Passlock2 relearn. After trying to start the car, let the key sit in the on position for 15 minutes. The security light will be on. Wait 15 minutes or until the light turns off. As this happens, turn the key off and wait 10 seconds. Attempt to start the car this time and it will kick over. Enjoy the sound of your new ecotec engine =)
32) finish up the install by completeing the re-assembly of your car.
33) after 100miles, change the oil and filter and run the brand you normally do. Its not a bad idea to change the tranny fluid too. enjoy the newfound pleasure of owning an ecotec powered jbody =)
please, if you have any questions or comments post them up.. this is going to need revisions in order to get it perfect. I'm adding pictures tomorrow as needed.
