Same color as my 86 I had back in the day. Mine was a custom, must be down a level from yours because mine was no where as nice inside. Mine also had a lot more rust. We used to call it the $hithawk. Best car for $300 / 5 months ever.

That color interior is not one I think I have seen in the junkyarding I have done.Car looks pretty nice being the age and looks straight to me.Tired after trucking so keeping it short.

It appears re markably good in these photos. And quite stock and complete. GREAT FIND! Where is the rust/
Best of luck with the project- we have all too few skyhawks and firenzas
(Quoting a past member)-"Never underestimate a First Gen"
This is a "limited" which was above the trim level of "custom"; it seems to have every option except for the 2.0 engine and a cruise control.
Here's the new doors and removal of the belt:
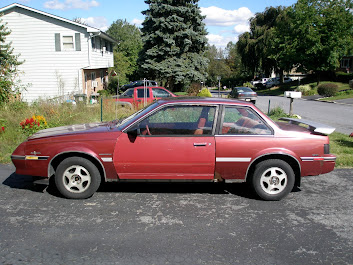
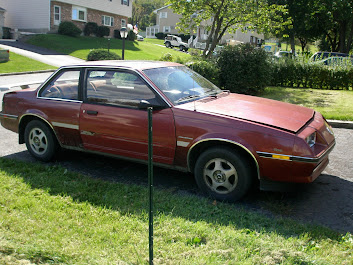
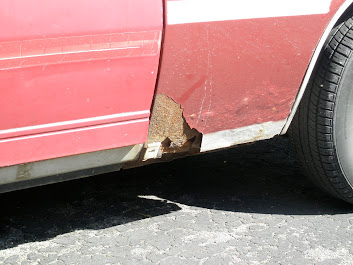
and some of the rust (I also removed a silver "plate" across the bottom of the doors, something I always called a water catcher/rust creator
installing the power locks (not that the installation is going well for me or anything...)

Wayne,
The doors look good! Any alignment issues or did they just fall right into place? Did you use new door hinge pins? And how easy did the old pins come out? I will be replacing the doors on my brown Cav this winter and this is the first time I have replaced doors by just popping the hinge pins .
John

Doors are easy when you have the right tool

Step 1: take some WD-40 and spray your old upper door pin the night before. If you are grabbing a door from a junkyard, you might want to spray the pin and take a 20 minute walk before you bother starting (since let's face it, there wouldn't be two people in the same yard looking for J's at the same time, let alone both wanting doors...)
Then take the bottom hinge off first by using an 15mm for the bolt inside the kick panel, and an 11mm box wrench for the outside bolt. You might be able to start it with a socket, but you won't get too far as there just isn't room for it, especially once it starts going loose. I've tried offset wrenches, etc., and there just isn't room for anything but an 11mm wrench, and I found using the box end just works better. You will only be able to get about a 1/4 turn at a time before you will need to pull off and reset the wrench on the bolt. It's time consuming, but if you get into a good rhythm, it's not so bad.
Once you have both those bolts, the lower hinge is now off the body and then take that pin popper tool (about $25 on Amazon.com, and well worth it--makes the job so much easier) and a rubber mallet and hammer away at that pin. Just have someone there to hold up the back end of the door while you do it because the door weight will put too much pressure on the pin as you are trying to remove it and you won't get anywhere.
Once that top pin is out, you're done! I have the process down to about 1/2 an hour per door on a good day.
I had two people with me to get the new door on, really it's just lining up the pin for the top part first and getting the pin in there. We also used a floor jack to help hold the door in the air. After the pin is in, it's just a matter of lining up the holes on the lower hinge and getting into a good rhythm with that 11mm to tighten that outer bolt.
All the skins are the same, so any matching door will do from any 1st gen J.
Well glad to see the donor doors on and rust free.You have that two tone look but ,heck at least the ones I got you were close and not like white or blue.Good luck getting it squared away and pretty toast after a longer day today.Good work wayne.

three tone--when i took the rubber belt off, the original silver was under it.
This winter should bring my paint job, but I want the new bumper on. I'm still trying to decide if I should take the belt off the nose though, it would leave an indentation of where it was, and I'm not sure how that would look.
mr. schiff i am also restoring a skyhawk and could really use those belts you took off if you are not gong to use them .does anyone know if they are available in aftermarket?
I dunno where your from or what your goals are. I'm in northwestern southern Ontario. I have a set of leather seats out od a 83 cimarron that is the same colour interior as what you have. I also have the front arm rest but I believe it has some splits in it if your interested... With it being out of a cimarron it has the back seat arm rest as well as the power drivers seat
sorry John, I tossed them.
Nobody here has ever mentioned having a Hawk, except Motorman, so I figured nobody would want them and I threw them out.
I didn't take the ones of the Hawk doors when I replaced the doors with the Z doors. The belt on the Cavy is lower than the hawk, and had a different look to it.
i am in southeast wisconsin. i have a 86 skyhawk limited coupe wiyh a2.0 tbi and a86 cav convetable rs with a2.8 .the hawk is two tone with a dark blue over a lighter blue and the cav is cayon red with a black top and red interior. i got addicted to these j-bodys after i bought the hawk and bought the vert a year later. i stumbled upon this site while doing research on these cars. i was reluctant to post because i am not very computer savy. i will post some pics of my obsessions when i learn how. they are both pretty solid and good looking cars. my goal is to get a j-body of every body style, coupe, vert, hatchback, wagon and sedan. i have the coupe and vert and found a hatchback but am having trouble contacting the owner. it is the only hatchback i have seen in the two years i have been looking. my friends think i am nuts for collecting cavaliers but hey everyone needs a hobby! anyway i am going to make a list of my needs and maybe someone out there can help me out. you all seem to be good guys and i have really learned alot from this site.
Getting the pics up is pretty easy, especially if you have Facebook or Google+ (I find Google+ easier than Facebook)
1. Upload the pic to any site where you can post pictures (photobucket, flicker, Facebook, Google+, etc.)
2. go to j-body.org and start or reply to a post
3. in the text box where you are typing your post, type [pic] This is a bracket [ (located next to the letter p on your keyboard) then type pic then close bracket. Next open another browser window or tab, whichever you prefer, and go to the site where your picture is stored.
4. right click on the picture and choose something like "copy address" (this could be slightly different wording depending on which browser you use)
5. Go back to your post and right click after your previously typed [pic] and right click to paste, then type another bracket [/pic]
before choosing post, choose preview and you should see that it worked.
sorry, i meant to use the letters img instead of pic in the previous post
Happiness is a new steering wheel

These are gonna look good when the car is painted...

Looks nice with the new wheel. But save all the old stuff as someday you might want to go back to stock and the old wheel was an option wheel and are hard to come by.
Keep us posted on your progress.
John

Looks like you are really enjoying yourself, Wayne!!
Thought about a hood scoop for my coupe, even found one, but haven't put it on yet....LoL, someone is bound to think I've got a lot more than 84 horses under the hood.
Look Mom.....no air bags!! That makes for lots of fun with changing steering wheels too.

I got a feelin' those alloys and center caps are very rare these days.......what am I saying!!! I think everything is starting to get that way nowadays....LoL Keep the photos and stories coming along!!


The new wheel almost matches your interior(unless the pic is not quite spot on for realness).Loooks good wayne.Nice touch

I think the look of the match depends on your computer's video card and monitor settings, but on mine it doesn't match as well as in person.
Live in person, it matches really great, which is why I went with the red trim instead of all black.
Wayne Schiff wrote:These are gonna look good when the car is painted...

I think I'd skip those and leave the hood as is unless you're going to make them functional and in that case I'd turn them 180 degrees and use them for heat extraction.

Can anyone tell I have the week off from work...
Wanted to get a better idea of what the car will look like when painted, so I used some tape to make the stripe, and yeah, it looks even better in my head when it is all done! The car will be black, with a silver stripe. The hawk will be black with a silver border.
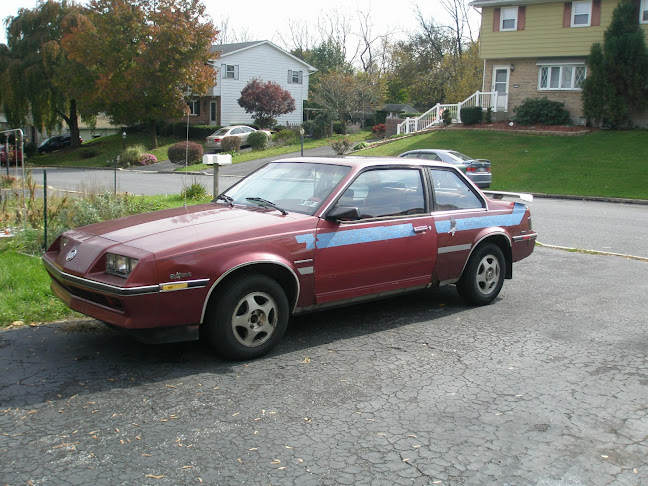
the stripe will stop and meet with the fender vents
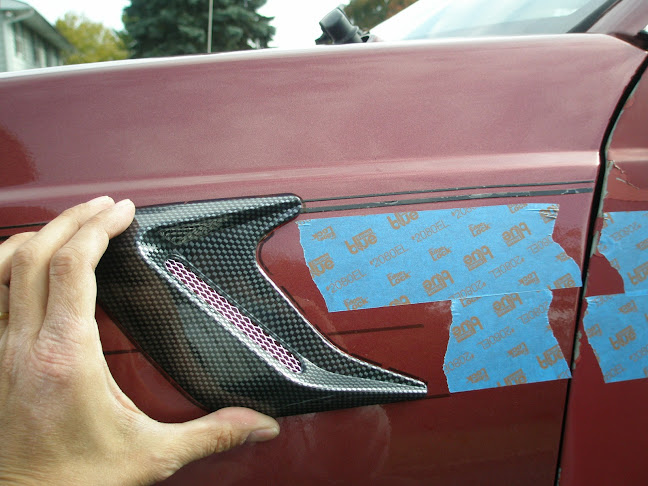
not sure yet if I'm going to use the 70s style Hawk graphic or an 80s style one, but here's the 70s Hawk

the stripe is going to go over the top of the spoiler and down the other side as well

i like the looks of those hood scoops wayne. could you take a sideview pic? from the front they look awsome, do they look as good profile? i was thinking about putting on some fender vents also. old buicks always had three of them. i think they called them portholes.your steering wheel looks great also but i like the stock one too. i would have a hard time deciding on that one. hold on to the old one, very hard to find.i came across a nighthawk last summer but it was too far gone too be usefull for anything. it was white with black graphics.i think the stripes were reflective, hence the nighthawk name. did not see any other differances from a regular hawk other than the stripes.they made another verssion called the silverhawk or something like that but i have never seen one. where did you find the nighthawk graphics?


