Pulling the motor and head would be steps that I don't cover in this, but they make the job a bit easier.
I'm also taking into consideration the timing cover has been removed as well as the cam sprockets.
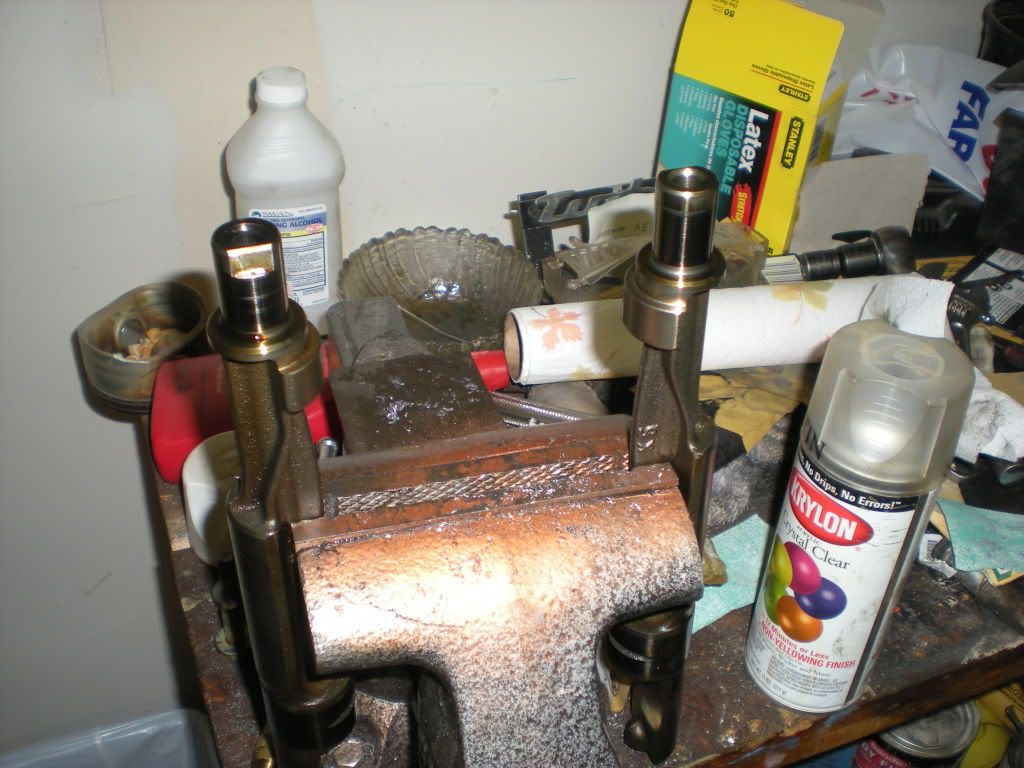
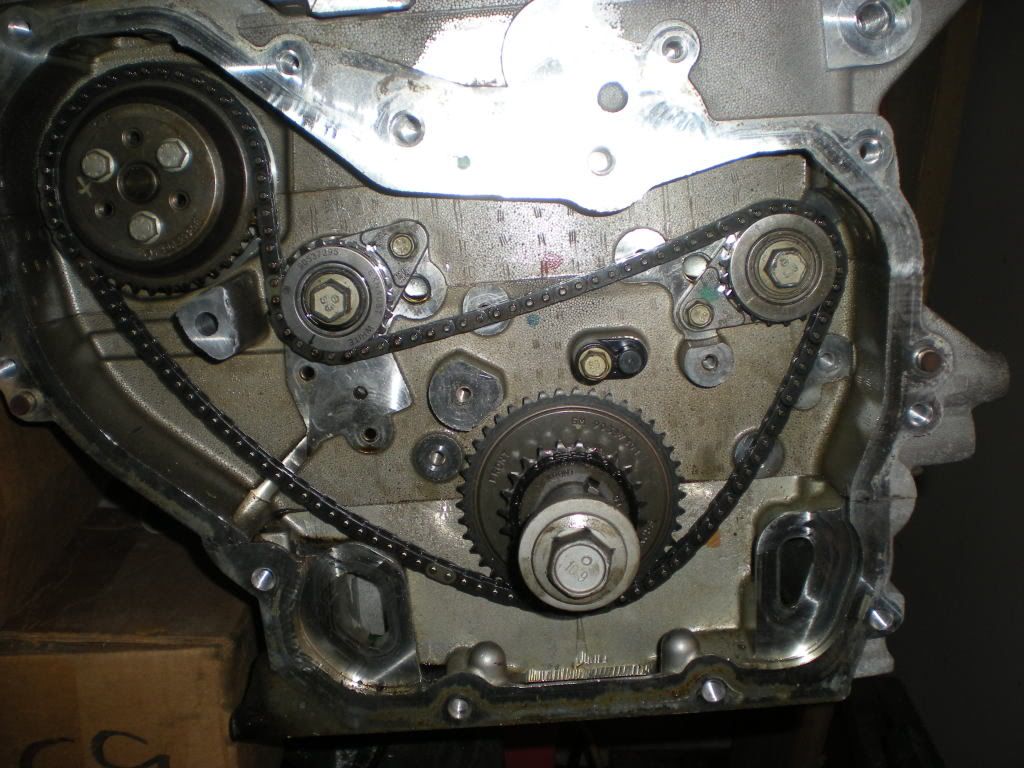
So with all that removed you will be looking at something like this.
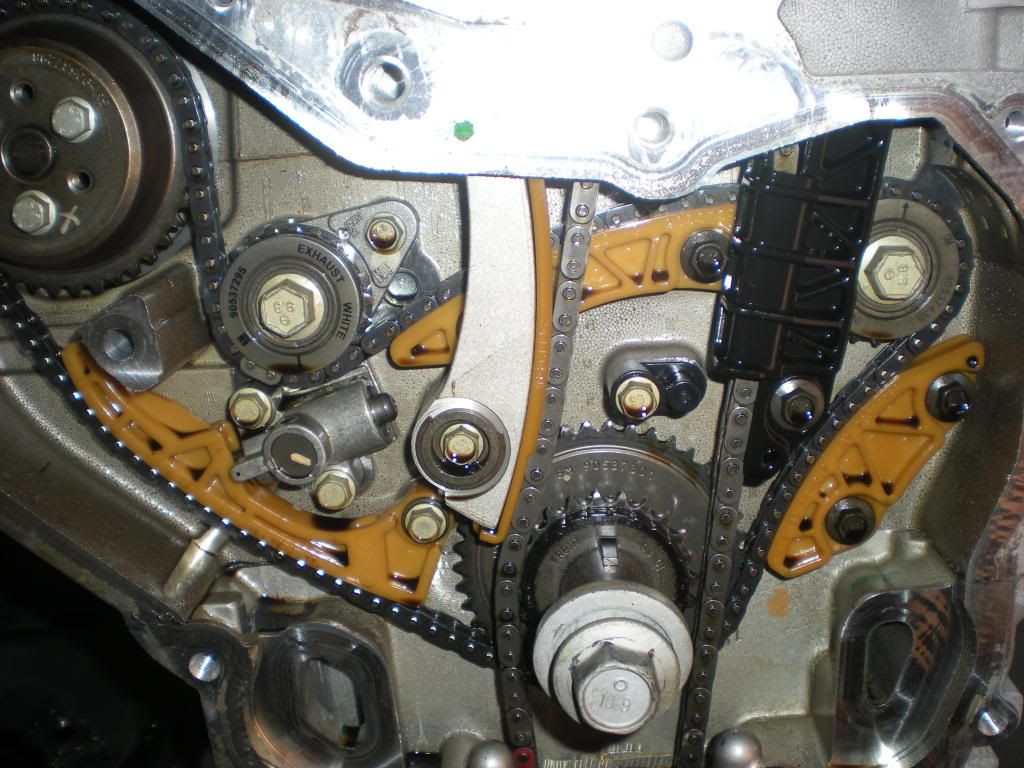
You will then need to remove the front 2 timing chain guides.
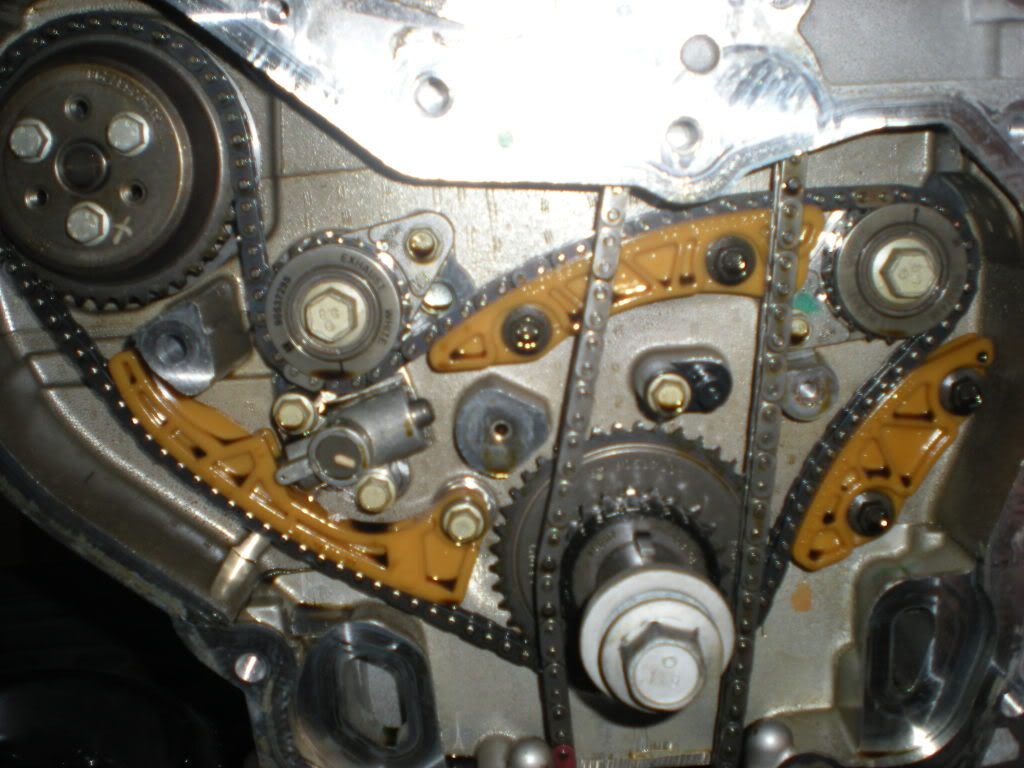
After those are out of the way you will need to remove the balancer/waterpump chain tensionor and all of the guides as well as the main timing chain (for ease of working)

Once those are removed you will be able to remove the rear timing chain, I let this hang off the waterpump sprocket. It's also just as easy to completely remove it.

Then remove the 2 retaining bolts, be careful not to mix up the intake and exhaust as they are different and will not line up correctly when you go to install the delete.
BE EXTREMELY CAREFUL WHEN REMOVING STOCK SHAFTS AS THE ALUMINUM IS QUITE BRITTLE AND WILL BREAK EASILY
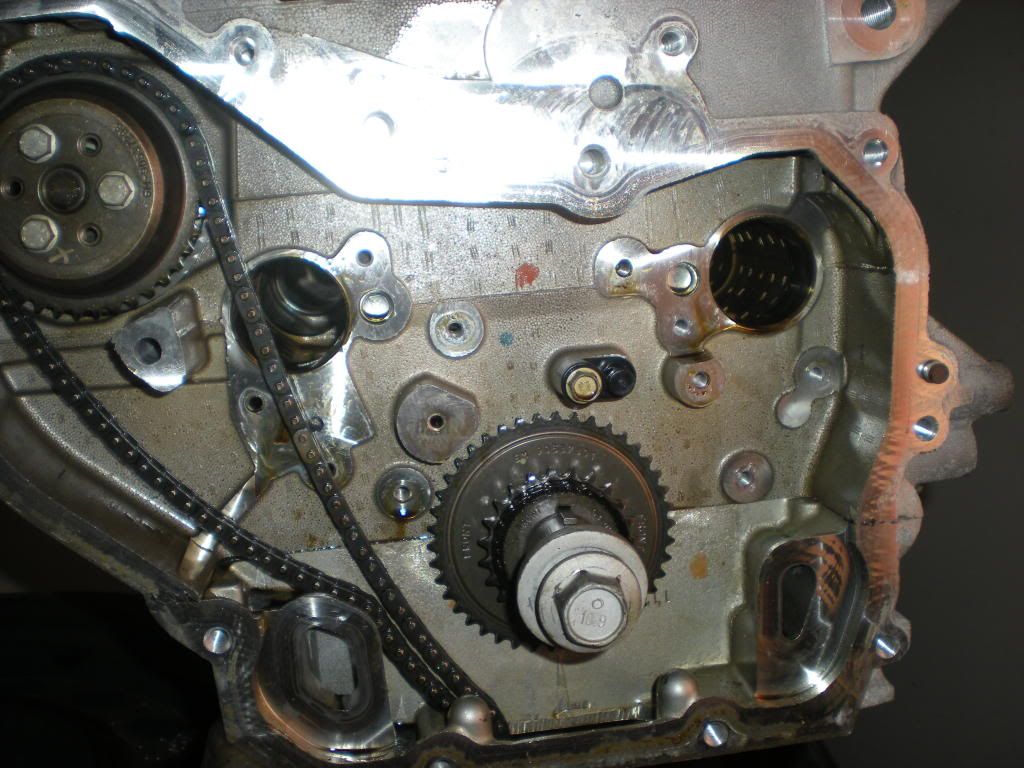
With the stock shafts removed you can attempt to hold the sprockets by hand and loosen the bolts on the top. I used a vice.
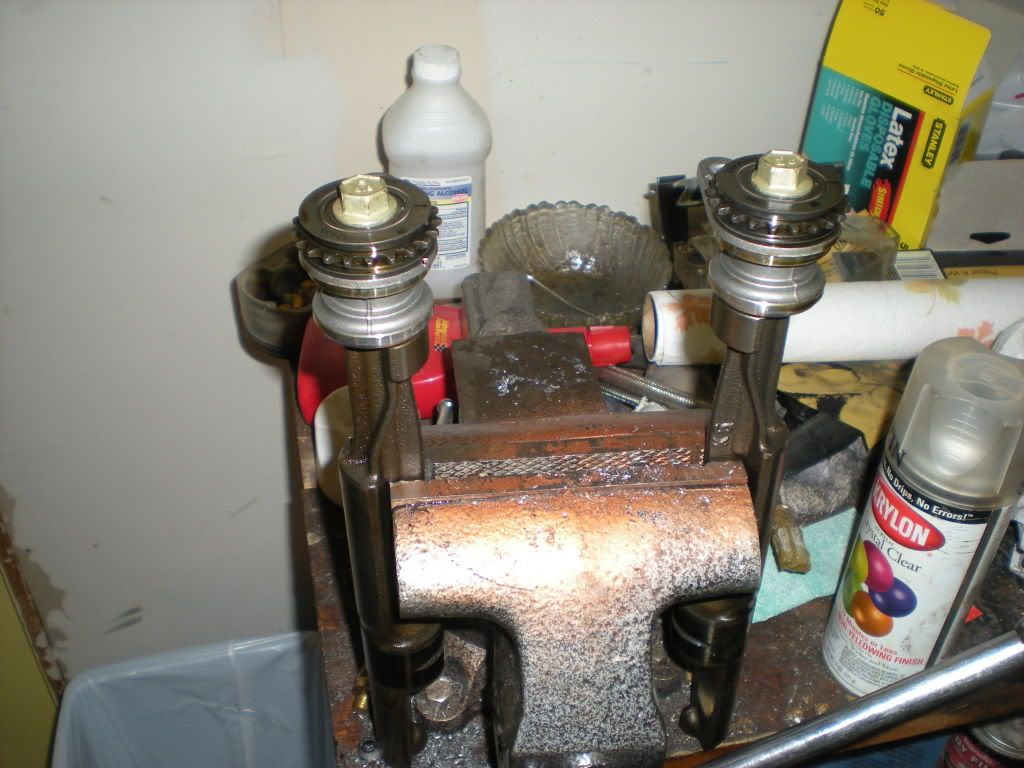
Remove the 2 15mm bolts from the top of the balance shafts and remove the collars and sprockets.
You will need some sort of tool. I used a 27mm impact socket and long extenstion and put the socket on the extension backwards to give me a guide for the bushings.
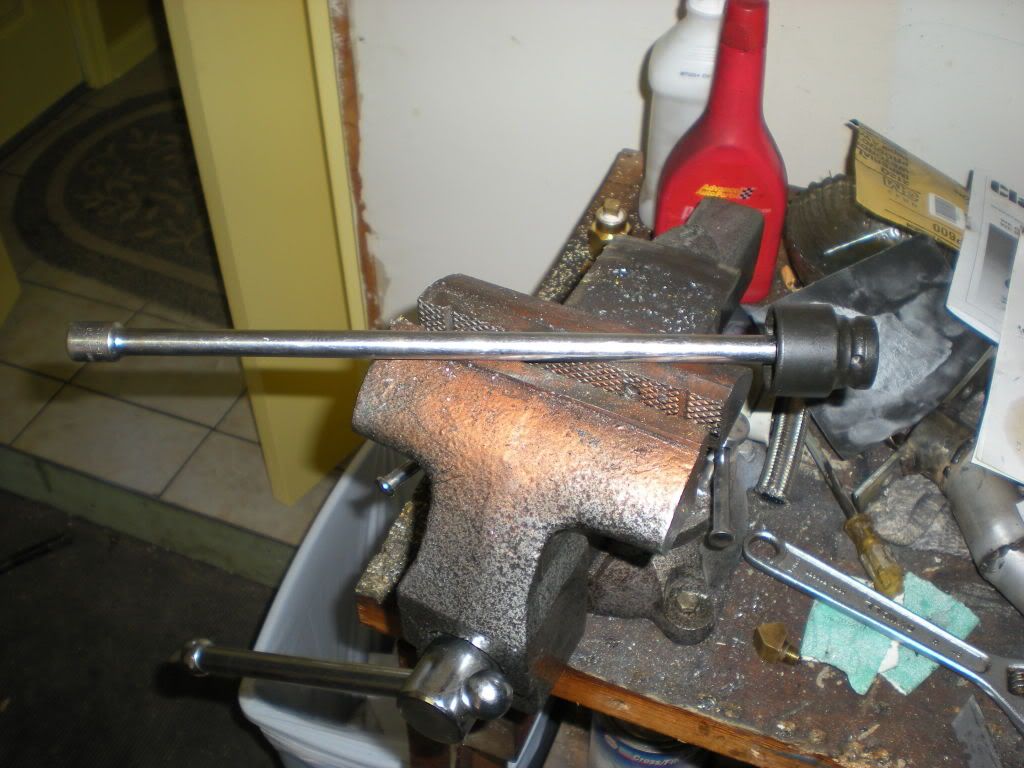
I had to hold the tool at a little bit of an upward angle to get the bushings to go in straight. With a few hits from the BFH the bushings were in.
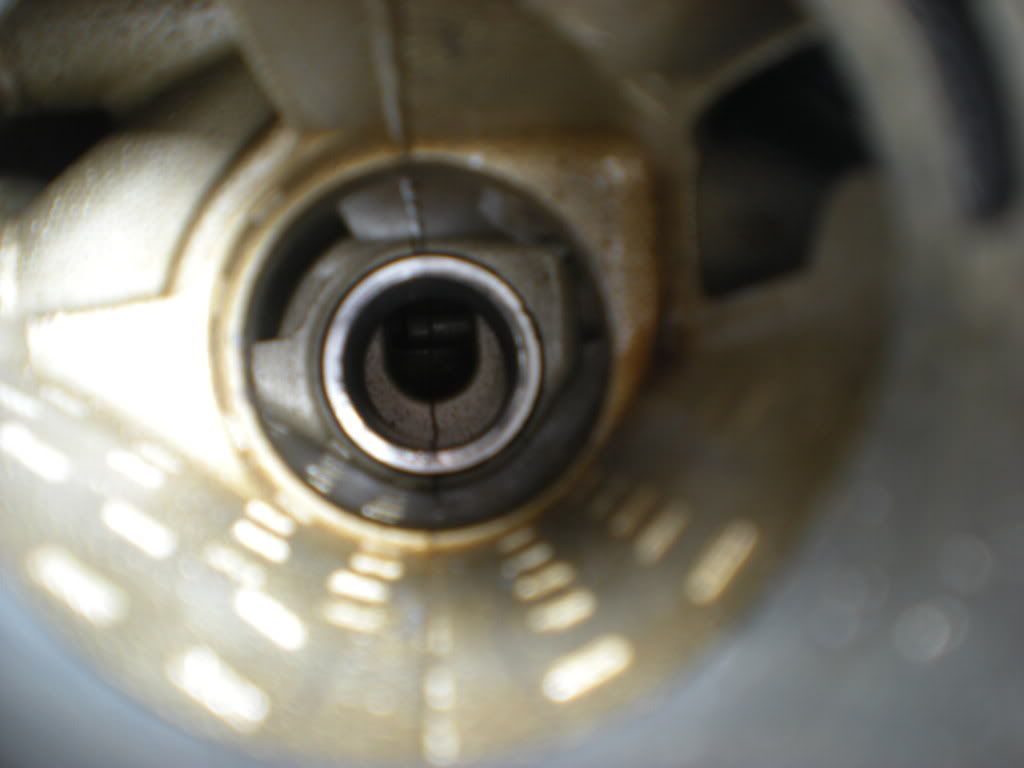
Now back to the delete. You will want to use some red loctite on the bolts that go into the delete kit. I put a leather glove on and held the sprocket and just cranked them in with a ratchet.
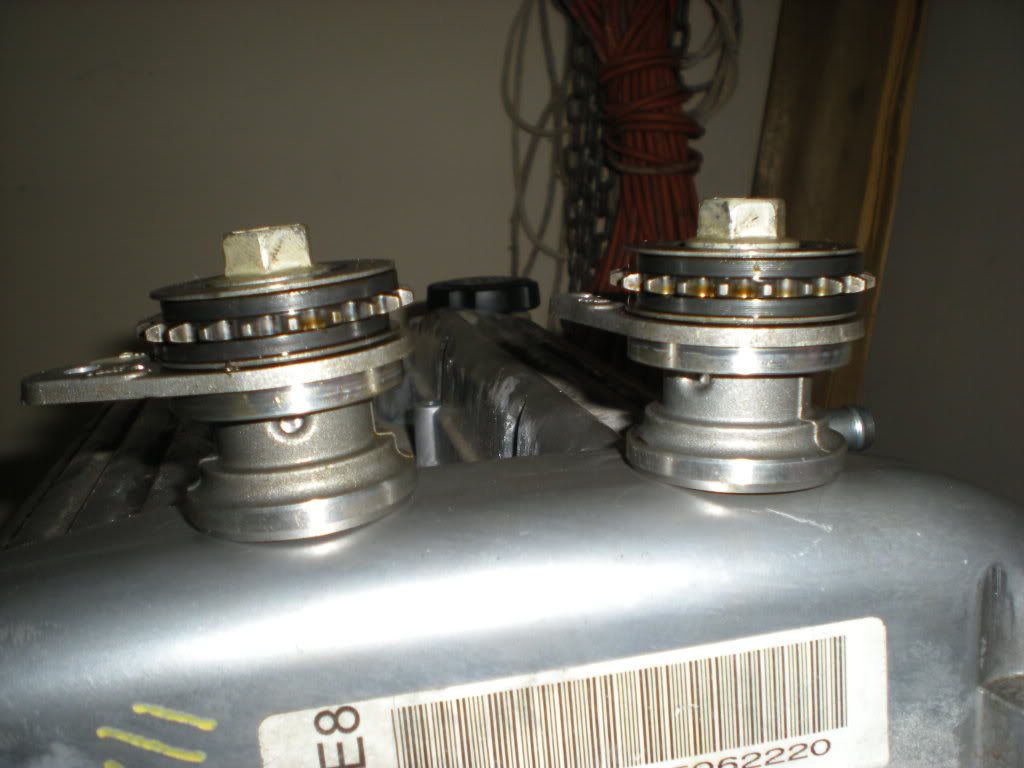
As stated before, the aluminum collars are quite brittle so that makes the next step a bit challenging. They are also a little tight in the block, so once you get them started, a rubber mallet on the center where the bolt is seems like the best option, it worked for me. Then tapping lightly with a screw driver to get the bolt holes in the collars to line up with the holes in the block. I used a long screw driver and just tapped it with the palm of my hand and it worked out quite well.
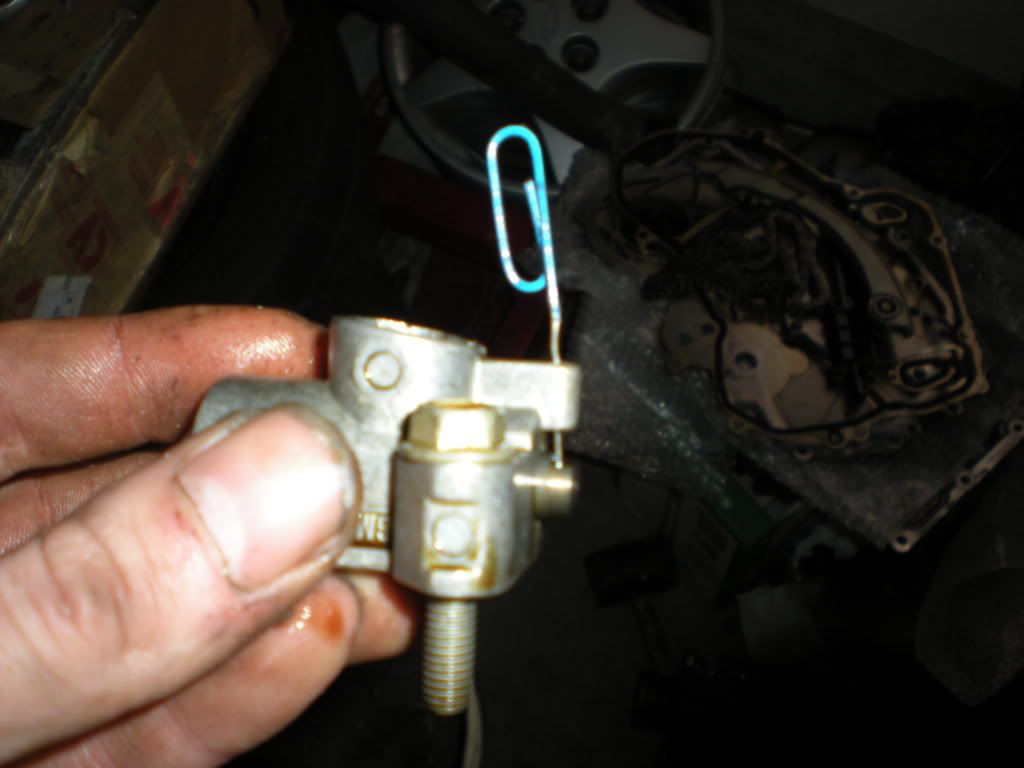
Now it's time to reinstall all the guides and tensionors. The rear tensionor will compress with a bit of a push and a slight twist, then to hold it in place you will need a paper clip, not coated, just regular metal clip. You will notice the coating on my clip was stripped back on the end that was to be inserted into the tensionor.
All guides reinstalled and tensionors in place remove the paper clip and you are done with the rear timing set.

You can then reinstall the front guides and front chain.
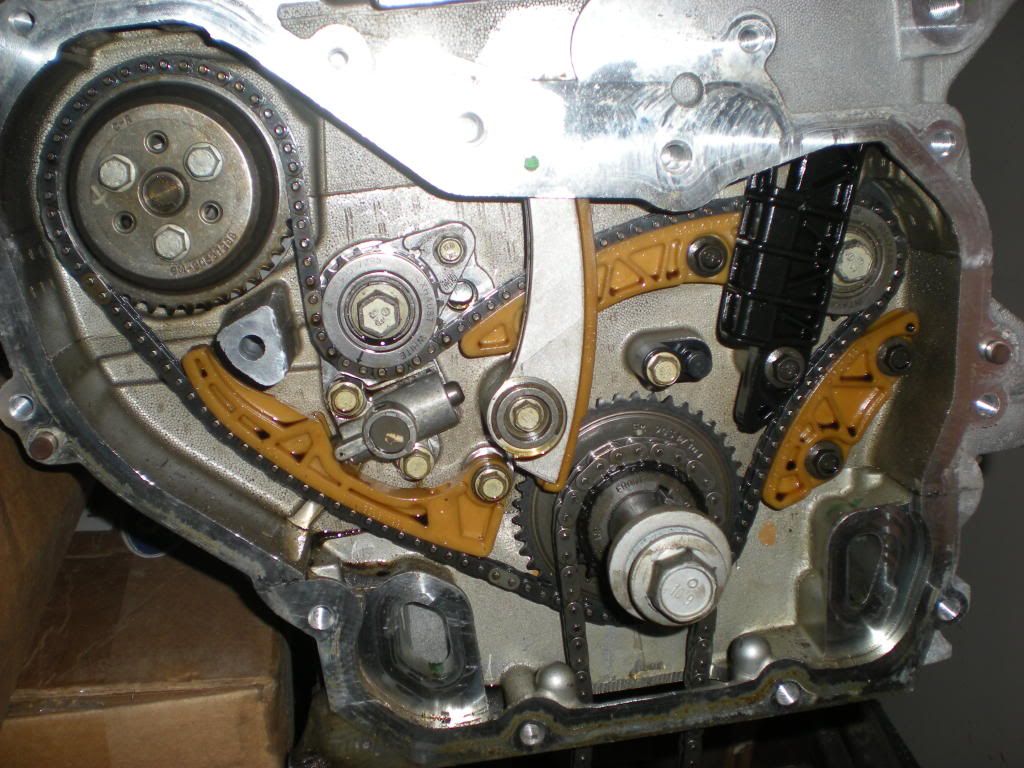
The cam sprockets and main timing tensionor was not installed at this time due to not having all parts. But this is for installing the delete

. Hope this helps anyone wanting to do this. It's quite an easy job. If it's your first time tearing into the timing area, just be careful and take your time. If you have any questions either post them here or pm me. I will answer to the best of my knowledge.
---------------------------------------------------
4 Cams...32 Valves...5 Liters...This Could Get Fun!

Nice write up, like the turbo badge

___________________________________________________________________

Hahn Stage II - Mitsu TD06-20g |3" Turbo-back Exhaust | 61mm Bored TB |
HP Tuners | Innovate WB02 | Spec Stage 3 | Team Green LSD | TurboTech Upper | Full Addco Sways | Sportlines & Yellows |
good write up
gotta say im pretty happy with my install
RIP JESSE GERARD.....Youll always be in my thoughts and prayers...


now call me retarded if you want to but what really does this help? since im never worked on an eco in my life the only thing i can see is reduced weight spinning on the timing chain.
i mean.. is there any performance gain by removing them other than the obvious weight difference?
not trying to be an ass so dont take it that way.. i genuinely would like to know.

Needing 2.3 oil pump stuff? PM me...
z yaaaa wrote:now call me retarded if you want to but what really does this help? since im never worked on an eco in my life the only thing i can see is reduced weight spinning on the timing chain.
i mean.. is there any performance gain by removing them other than the obvious weight difference?
not trying to be an ass so dont take it that way.. i genuinely would like to know.
i would think it would be the same as removing them on a 2.4L... less rotating mass being driven by the crank. and a little bit less static weight too (i say a little bit less because it was mentioned its aluminum).
but same problem as the 2.4L too with the removal and the increased vibrations and harmonics i would think! hurray for harmonics!
1997 Cavalier Z24
Bomz Short Ram Intake
Vibrant Cat-Back
KYB GR2 Struts
Goldline 1.75" Springs
RK Sport Upper Insert
RK Sport Lower Dogbone
Custom Tune by Shane @
innovativetuning@rogers.com
15.647 @ 88.02 MPH
The performance gain is being able to rev past 7k and not worry about having a shaft come out either side of the motor and the reduction in rotating mass has been noted. The stock shafts are quite heavy compared to the delete.
The collars are what's aluminum. The shafts and the delete are both steel, but as oppose to having a full shaft, you only have the "nub" on the end. You see in the first few pics how long the stockers are, and before the install step you see how short the delete is. The delete is nothing more than the end of the stock shafts cut off so the sprocket has something to mount to.
---------------------------------------------------
4 Cams...32 Valves...5 Liters...This Could Get Fun!

Inner bushings supplied by level zero motorsports
Inner Bushings
Delete was done by me, cut off the stock shafts, then milled them flat. Can also be purchased from level zero as a whole kit.
Balance Shaft Delete Kit
---------------------------------------------------
4 Cams...32 Valves...5 Liters...This Could Get Fun!

The purpose of the inner bushings is to block off some oil passages in the inner bearing section where the stock balance shafts would normally sit. Without those you would suffer extrememly low oil pressure.
---------------------------------------------------
4 Cams...32 Valves...5 Liters...This Could Get Fun!

ah... i knew there had to be something else to it....
very nice.

Needing 2.3 oil pump stuff? PM me...
I used a peice of steel shaft that fits nicely in the balance shaft chamber and takes up enough of it that it aligns the blocker sleeve pretty easily (after I tapered the edge slightly so they'd self center easily). Made install a LOT easier and gave me something long enough to tap with a hammer to drive them home.
I weighed the two shafts together and it was about 10-15lbs (the scale I used rounds up to the nearest 5lbs). pretty sure the shafts themselves are iron.. just like camshafts.
Awesome write up! I still want to see someone successfully do this with the engine in the car. I tried, and even after disconnecting my engine mounts I still couldn't sneak them in.

That was a great write up..And pics..I have the whole kit from LZM..Clayten Did the install for me..So I never seen what it all looks like..It makes such a great diff..If I ever have to do another Eco swap this will be done again..
Thanks for the install Skunk, you dah man!
My motor is becoming such a whore!

I installed my neutrals with the motor in the car. I had to drop the sub-frame to get the motor down far enough to get the stockers out, but the neutrals went in just fine because they are a bit shorter than stock. I'm sure this could be done with motor in car, if the cam sprockets were removed to get the black chain guide out and as mentioned the sub frame and possibly axles removed to lower motor far enough to get the stock ones out and have the angle to be able to strike the tool of choice to be able to install the bushings.
---------------------------------------------------
4 Cams...32 Valves...5 Liters...This Could Get Fun!

Sticky this for sure..... PALEAAAAASEEE!!!!
Nice write up.
One very important thing. After you reassemble the balance shaft chain assembly you need to tighten the bolts to the proper TQ specs. The loctite might prevent it, but i had one customer not do this and it resulted in the bolts spinning themselves loose. He got lucky and not long term damage was done.
DaFlyinSkwir(LS61) /PJ/ OEM+ wrote: I still want to see someone successfully do this with the engine in the car.
LOL I"m going to prove it and you're going to buy me a beer

I actually plan to do the BSD on my woman's car to improve her fuel economy once the weather clears up, I will be sure to take pictures and prove it can be done with the engine in the car.
z yaaaa wrote:now call me retarded if you want to but what really does this help? since im never worked on an eco in my life the only thing i can see is reduced weight spinning on the timing chain.
i mean.. is there any performance gain by removing them other than the obvious weight difference?
not trying to be an ass so dont take it that way.. i genuinely would like to know.
It removed roughly 10lb of rotating mass that spins at double the engine rpm. This does two main things. Frees up power by reducing parasitic drag, exactly the same as lightening you flywheel. And it also allows you to rev higher without worrying about the balance shafts exploding. The balance shafts by design are unbalanced, so at redline you are spinning two unbalanced items at 13200 rpm .... much past that and something lets go.
I look forward to it clay! I got myself in a lot of trouble when I tried that and got marooned without a car (and got rained on too) I REALLY wanna see what the hell I did wrong lol

LOL that sucks. Don't get me wrong it's not super easy. The hard part is getting the stock shafts out, everything else is straight forward. You have to remove both the upper and lower mounts and pivot the engine forward and down. It's also easier if you remove the collars with the shafts still in because you don't need quite as much room. The only way to do this is to crack the bolts before you undo any of the timing assemblies because you need the chain tension to hold the gears steady.
I've got a local customer thats thinking about doing the delete so I might be doing an install with the engine in sooner then expected. I'll be sure to take pictures and post them.
Yeah removing the collars before removing the shafts with motor in the car makes life a little less complicated. You don't need quite as much room, but as Clay said, forward and down, or the Skunk approach, drop sub-frame and remove pass axle.
---------------------------------------------------
4 Cams...32 Valves...5 Liters...This Could Get Fun!

another thing to note so nobody wastes their time, once the delete or nuetral shafts are in there is nothing to time on that chain so you don't have to worry about lining up the marks, you only have to time the cams.

Thanks Ryan. I forgot to mention that.
---------------------------------------------------
4 Cams...32 Valves...5 Liters...This Could Get Fun!

z yaaaa wrote:now call me retarded if you want to but what really does this help? since im never worked on an eco in my life the only thing i can see is reduced weight spinning on the timing chain.
i mean.. is there any performance gain by removing them other than the obvious weight difference?
not trying to be an ass so dont take it that way.. i genuinely would like to know.
Like everybody else already said- less weight that the crank has to drive--- Not sure what the exact result in an Eco is, but in the old Chrysler 2.2/2.5 turbos, removing the balance shafts would actually net close to 15 WHEEL hp. But that was a solid decade before the Eco, so I would hope the Eco's don't rob THAT much... but who knows.
Arrival Blue 04 LS Sport
Eco
Turbo
Megasquirt
'Nuff said

Hate to bring this up from the dead, but I am just wondering if this is something we can do on a relatively stock engine without worrying about getting it tuned right away.

had a blown ecotec swapped 2000 cavy, now just an 02 Grand Am, and a 74 BMW 2002...


