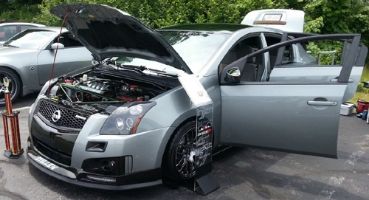
ZeeTwanky helped me with tips on this one!! Thanks Dude!!
Well, Its been a year in the making....in my dreams that is. Lost jobs, blown motors, more lost jobs, family funerals....all of those things tapped my funds and not including a winter beater that had a rear end fall out of it (literally) but all of that motivated me to do things on my own. This box was built by my buddy Joe Collins Father "Senior" this thing is built like a damn tank!! The molds are ready for fabric today and resin tomorrow.
I havent designed the front side as of yet but the trunk is done with the design part this is for 2 Kicker L7's in a 2.5 cubic sealed enclosure.The front will hold the sub amp and a seat delete to mount the air ride setup. The only problem with that is the noise from the compressor

All the rings will have fabric stapled to them and brought up to the lip of the trunk filling the entire thing then resined.
Center hold: Hifonics mid amp
Side Holes: 2 Optima batteries one on each end
Bottom hole: for the fuse holders


I had to remove the springs on the trunk to get the box to fit. Let me tell you those things are freakin heavy without them. I will have to use hydrualics or actuators to raise the trunk now.

lol im starting my first FG project in a week so keep updating pics...i like the layout tho

Nice start! Love the custom work!

"Remember do what you like because you have to drive it."--Me
Gonna look great. Maybe you can use the shock from the convertable cavs to open your trunk?

Everything is just inside the trunk lid what I hope is that once its all resined and glassed it will be heavy enough to just sit in place and when I need to remove it the thing will just lift out? thats what I hope happens. It should?
Takin a break. Back to work now. Gotta wrap the thing

Looking good man! Nice layout and structure! Looking forward to seeing it wrapped soon.

lol...judging by how close the box is to the rear deck (height wise)...there is no way the box and amp/battery rack are gonna come out in one piece.
Looks good though.
Since you are doing a seat delete...I would have put the subs in the car and kept the air ride stuff in the trunk.

the box will stay, basically all the rings will lift out together the box will stay in the car. that stinking thing wont come out without the trunk being taken off. the amp rack will lift out. the amp if bolted to the box.
I wanted all of that in the backseat but I just didnt like the design ideas I had. Oh well, I have to deal with the noise I guess


design looks good
for the noise just recess them down under plexiglass and dynamat trhe crap out of the sides and bottom
we did it in a truck and you cant hear crap
I am soaking the certer pieces since the edge is so damn hard to get smooth. Once this other is hard enough, I'll attack the edges in those corners and resin those later. I might have to build suppot in there and cut the fabric to pull out the wrinkles.

back to work....post more tonight maybe?

Aahhh!!! flannel man!!!

At least you are glassing over that flannel, lol!!

I LIKE YOUR WORK BENCH!!!!

works better to make hotdogs off of. we had it at one show with all of the toppings on the spoiler and hotdogs on the bumper. Its one hell of a bench for sure

Looking good bro. Looks like there are a lot of wrinkles though. You should have used a more elastic fabric for such a large area. Get those wrinkles fixed and it should look sweet. Good luck man, keep me updated.
-Nate (ZeeTwankyFo)

It wasnt so much the elasticity that got me but the amount of fabric in that corner. I had never wrapped anything like this before so all the angles caught me with my pants down. I still have some wrinkles in the final piece on the left battery terminal. What I ended up doing was cutting all of those corners out and making a patch there. I'll have to secure them from the backside with some fiberstrips but, I learned a lot on this project. I'll definately know what not to do on the backseat one when I tackle that. For now, onto bed and work more on it tomorrow.

Looks good... Thats gonna be all pretty heavy in the trunk though right? Keep it up.
~2014 New Z under the knife, same heart different body~
______________________
WHITECAVY no more
2012 numbers - 4SPD AUTOMATIC!!
328 HP
306 TQ
looks real good so far... yhe more pice the better cause I plan on tavckling this over winter.... what products are you using and grit of paper ect..?
thanks

Here are some updated pics. Maybe this will help make sense on how it will work?
Cover in place

Cover off showing battery rack and flat piece for fuses later when wiring

Cover off. It came out so easy just as I thought it would

there are some wrinkles from not being experienced but now I start the process to fill, sand, and fix

sndsgood wrote:i'd higly suggest putting it bak in the car and doing the rest of your layers and filling. it will still be curing a few days later after you think its dry and may warp funny. looks like you got a good start. reminds me that i need to get back to work on mine........
Very very wise words. It may feel hard, but until it is cured it can warp extremely easily. Especially when it is hot outsite. Let it cure in the car and add a few more layers before you remove it again. Looks better in the later pics. Looks like you got most of the wrinkles out. Keep us posted man. I love these projects.
-Nate (ZeeTwankyFo)

I took it out earlier today as posted and then I read that reply by soundsgood and I was like "ah its been 15 minutes, its ok".......WHOA!!! It moved out of position on one side. I had to put it in the sun and put some clamps on it to get it to settle down. It moved a little back to original position but its not as perfect as it was. Lesson learned there. With this being a cover piece only and not a support structure of any kind I figured it was hard enough with the resin. I soaked the front side but the fabric I used was so stinkin thick that it never got through both sides.
I thought it was the resin at first curing too quick so I played with a piece sitting in a bowl with resion on top and the resin never seeped through. I had to cover the back also. I cant stand on it but its really strong. I cant saw on it, I can barely drill through it so I really think I can use some of that fiberhair stuff at Oriellys Zee was talking about for filling and final strength. Does that sound ok? If this were subs, or support I wouldnt even consider it but this should be ok?
The beast is going to be wrapping it in suede.....not looking forward to that but, I am recruiting more talented help.

and that talented help is ......... who .....?
Looks good so far Kelley ....
Call me ...


