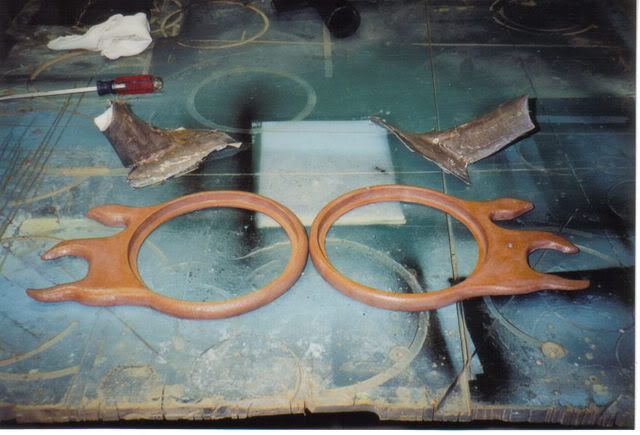
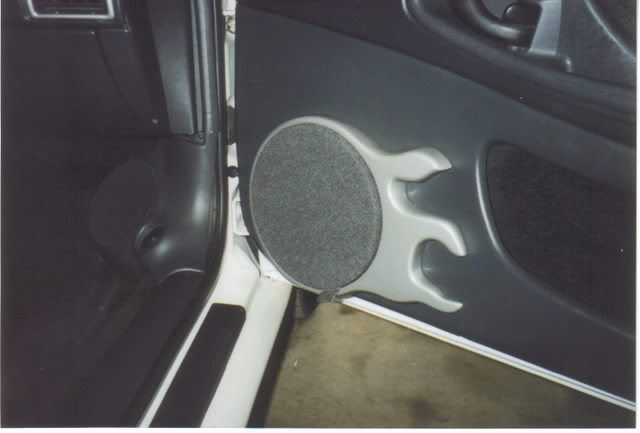
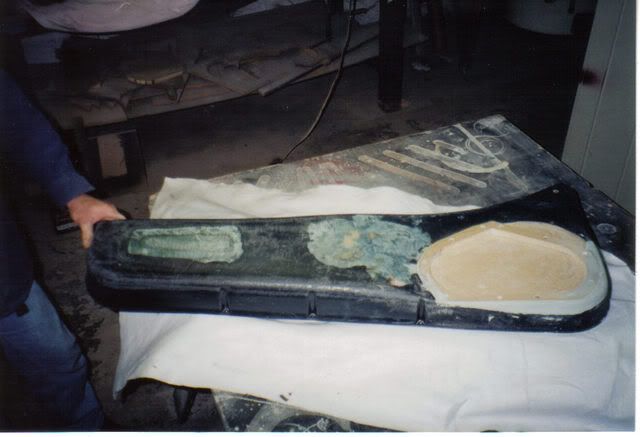
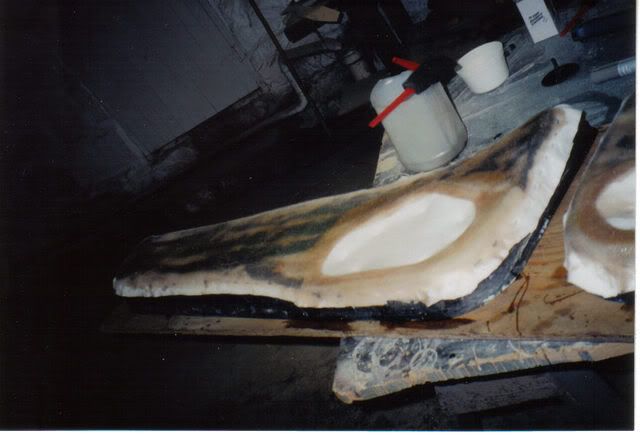
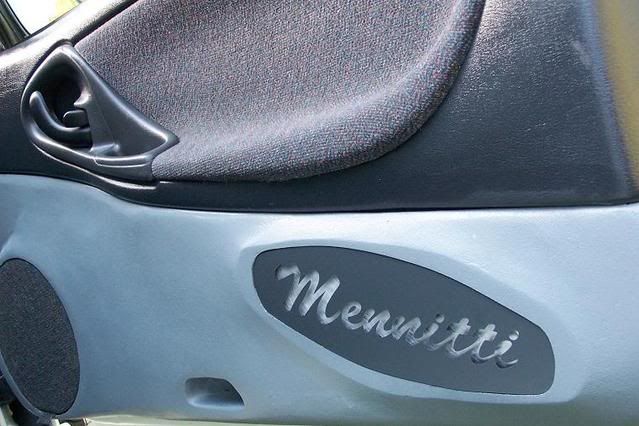
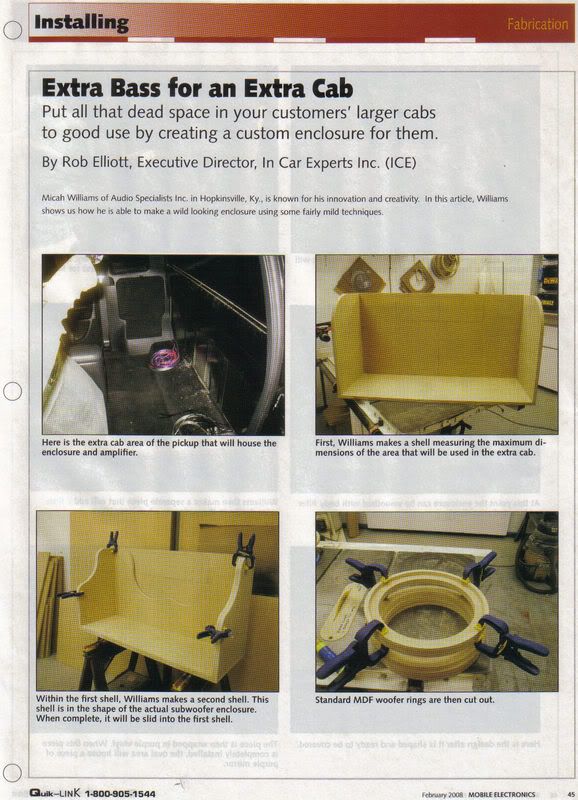
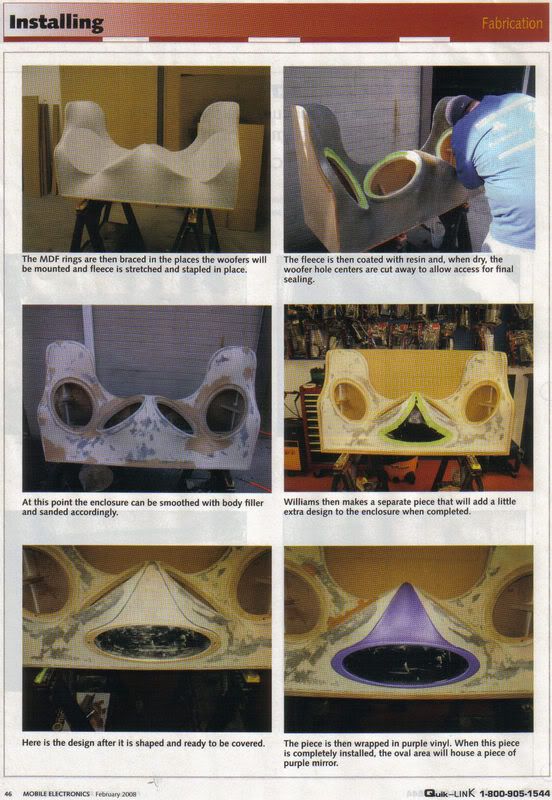
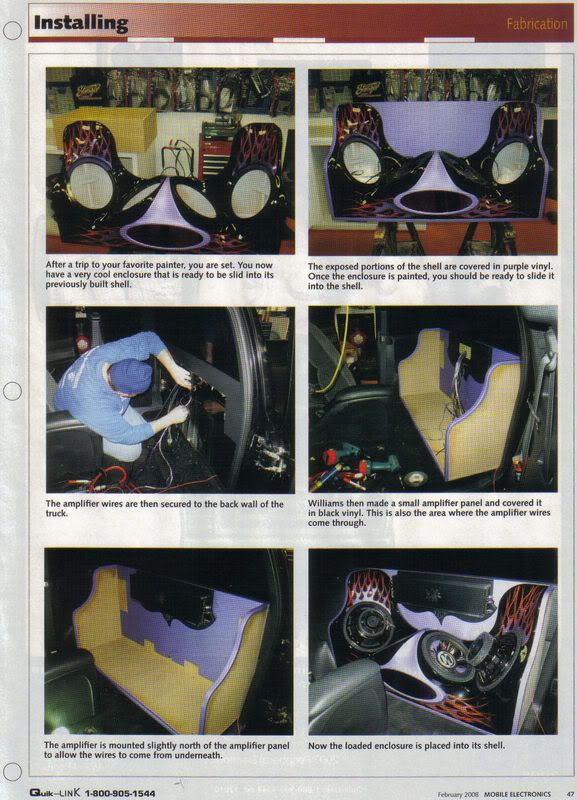
Here are the instructions for constructing a custom fabricated dash, subwoofer enclosure, trim panels, switch panels, etc.
Caution. 45 pictures included.
Use common sense. Here are the basic ideas involved in fabricating with the secrets I used in my car; it does not include every minor detail in the process. If you are not mechanically inclined, then do not attempt any of these procedures. There are several people on this site who have more skill with body work than I do. This is only a basis for providing ideas to anyone beginning to modify their car using a blueprint from a car built to compete in sound quality competitions, and hopefully answer the questions I repeatedly get asked. This car has been featured in Car Audio & Electronics magazine, Car Sound & Performance magazine, and the JBody magazine. It has also won countless stereo trophies in sound off competitions.
Tools and Supplies:
Fiberglass resin
Yards of Fleece
Foam brushes
Body filler
Spreaders
Fiberglass mat
DA sander
Right angle grinder
Air compressor
Metal suitable for bracket making
¼”, ½” and ¾” MDF wood
¾” Plexiglas
Table saw
Brad nailer
Staple gun
Super glue with accelerant
Lots and lots of elbow grease
Trunk:
Amp Rack
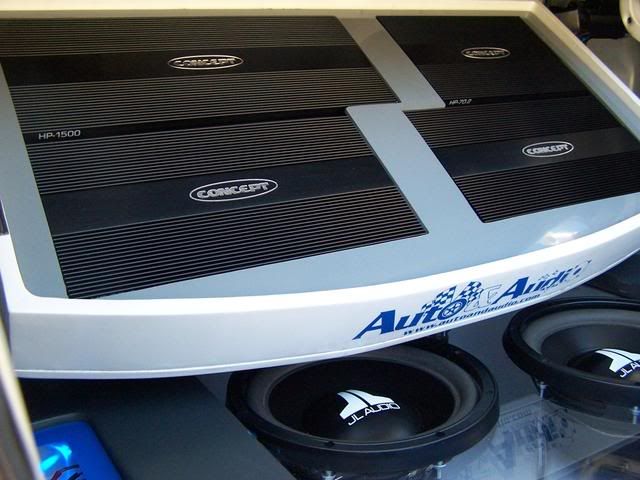
Here is an amp rack which is my current/final set up. It is hinged and located under my rear deck. The rack features a curved front end that lines up perfectly with the curve of the trunk’s opening. The rack houses four high end Concept amplifiers which produce 2,200 watts for a sound quality configuration.
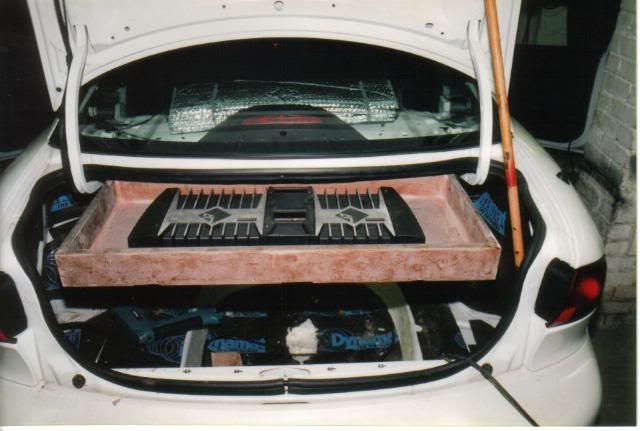
1. Plot your dimensions of available space and make sure the amps will fit. As you can see by the photos, this rack was designed for Phoenix Gold amplifiers originally. This rack was built using ¾” MDF wood, body filler, and fiberglass.
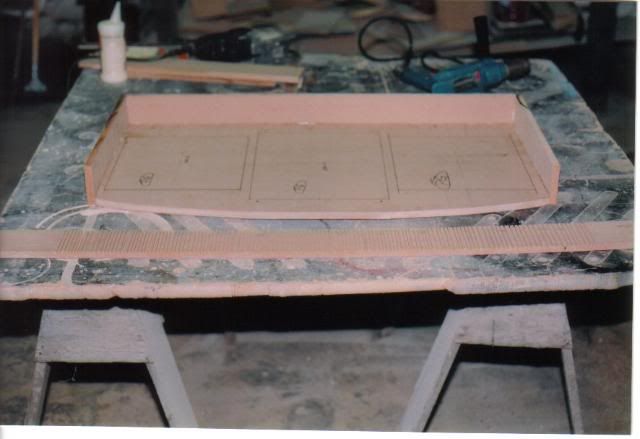
2. To make the wood bend along the front edge to match the trunk opening perfectly, we made relief cuts. The front side of the rack had to be notched with the table saw every ½”. The cuts into the panel leave ¼” of wood on the front edge and allow the board to bend.
3. Once brad nailed into place, the rack was turned on end and the open slots were filled with wood glue.
4. Using body filler, a “finger roll” was applied to the inside corners and edges. This rounded the inside of the box and provides a more custom look. Once sanded smooth, the entire rack was fiberglassed 3 times, sanded smooth, and painted.
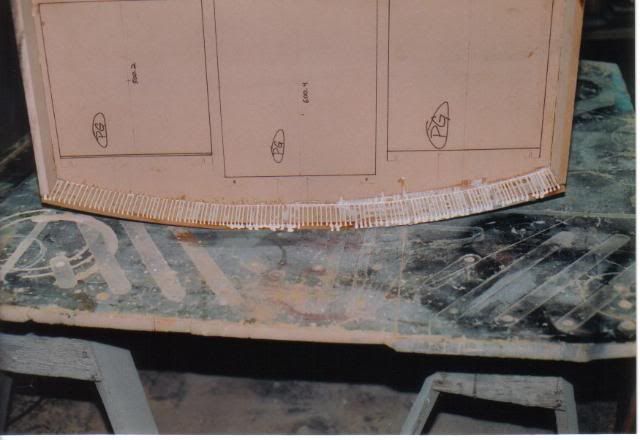
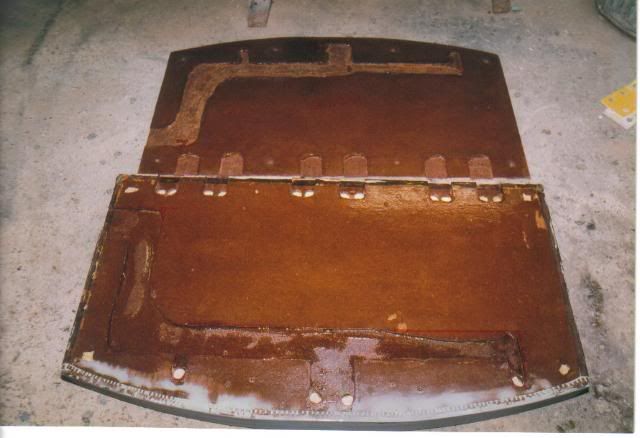
5. The bottom of the amp rack then had channels routered to make room for the amplifiers wiring. Note the matching cover plate which will spin around and conceal the wiring underneath the rack. The rack was drilled and nut-serts were installed for the cover plate to mount to the underside of the rack with machine screws. This gives you a clean looking installation by concealing the wiring and scoring points with some judges.
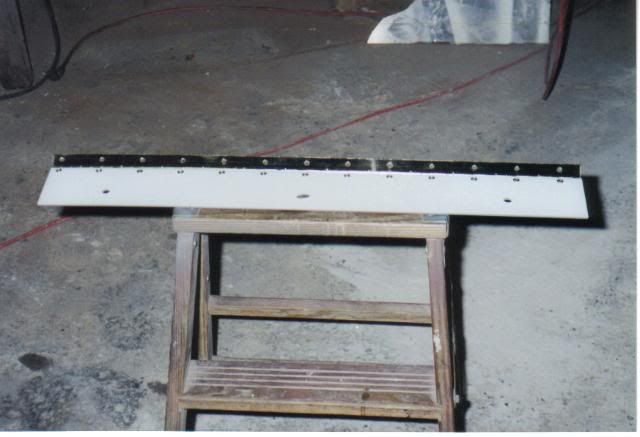
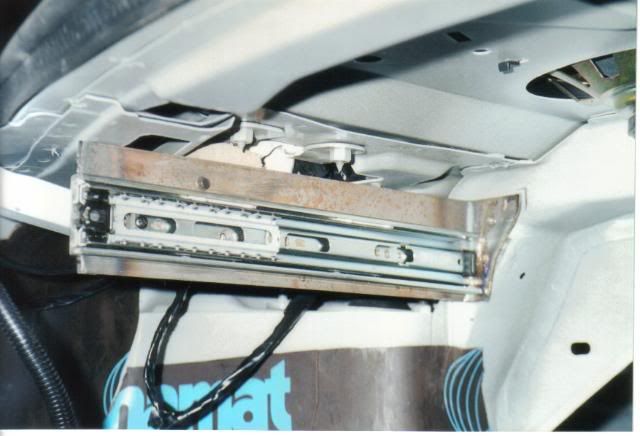
5. To mount the rack underneath the rear deck a ¼” piece of iron was cut and drilled to bolt to the car. A bronze piano hinge was attached using machine screws and nuts for aesthetics. Here you can see the finished bracket ready to install.
This is what the rack looks like finished with a ¼” painted-Plexiglas trim panel. The power for the stereo comes from an additional battery. The how to for this is located in the Audio and Electronics forum
How To Adding / Relocating Battery to the Trunk
 Old Amp Rack
One of my many previous set ups consisted of an amp rack for Rockford Fosgate amps that slid out from under the rear deck on tracks by a linear actuator. You can find my tutorial on hooking an actuator up in the Audio and Electronics forum
How To Motorizing Panels or Trunk Lids.
1. To start out, find the location you plan to mount your amp rack. Under the rear deck I found a brace. The brace was recessed and required a small piece of ¼” MDF wood to be sandwiched together when mounting the metal bracket pictured for a flat solid mount. In the photo you can see the ¼” iron bracket used to mount the drawer slides to. These slides are 75lbs load rated. When fully extended the rack with amplifiers would put many pounds of stress on this mounting system and we wanted it to hold up over time.
2. Just like above; channels were routered in the underside to conceal wiring. The cover plate flips around and screws to the bottom of the rack using machine screws and nut-serts for a clean professional look.
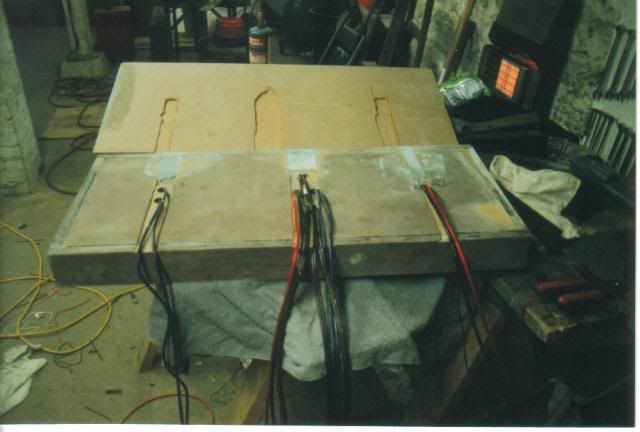
3. The rack was constructed using the same ideas listed above. It is ¾” MDF with body filler and fiberglass.
 Subwoofer Enclosure
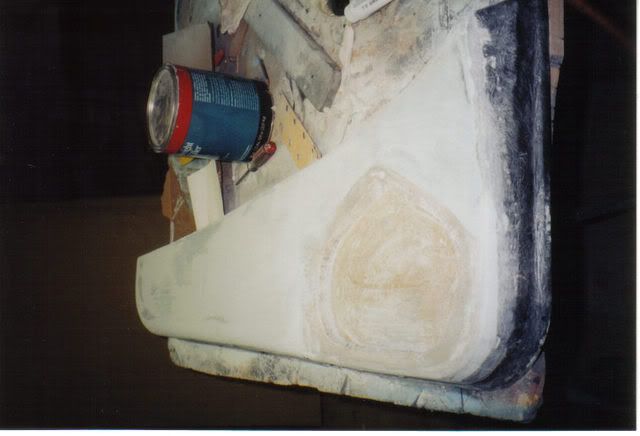
This was the first custom project I started on the car in 1999. Keep in mind the pictures are not the best way to build this. I think the main reason the guys at the shop started me out this way was to discourage me with all the sanding so I wouldn’t pester them with more projects in the future.

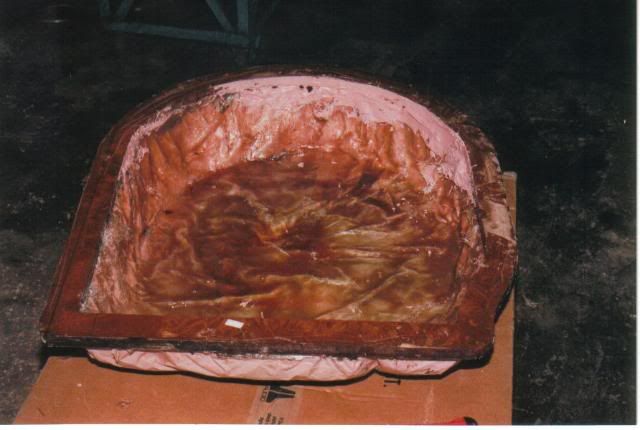
Over time from going to shows, watching Pimp My Ride, and reading articles every month by Steve Brown from Alpine and Dave Fishman Rivera, here is how I recommend you build one by today’s methods.
1. Trace your spare tire cover onto ¾” MDF wood and cut out a 3” border. You will notice a groove that the spare tire cover sits in inside the trunk.
2. After cutting out the mount for your spare tire, cut a board that fits on the bottom of the spare tire well’s floor.
3. Mask off the spare tire well with plastic wrap or masking tape.
4. Attach fleece to the top border piece, insert the bottom board for the floor piece and press it firmly against the floor stretching your fleece tightly forming the walls of your enclosure. Temporarily pound a couple “legs,” or strips of wood in place between the top border and the bottom floor piece which will hold the board to the floor.
5. Thoroughly soak the fleece and wood (not the spacer legs) with fiberglass resin.
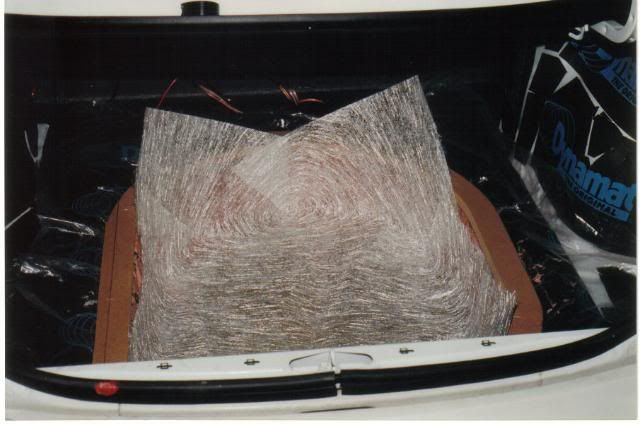
6. When dry remove the “legs.” Scuff the glassed fleece with 80 grit sand paper to promote good adhesion of the next coat.
7. To strengthen the enclosure I applied several layers of fiberglass mat scuffing between coats and making sure to stipple out any air bubbles when laying mat. Make sure you do not get this on the bottom floor piece. You want the floor as flat and smooth as possible for finish sanding later on. The only thing to add to the floor is straight fiberglass resin to seal up the wood.
8. Carefully remove the enclosure when completely dry. Thoroughly scuff the enclosure and apply a layer of body filler as smooth as possible.
At this stage you may want to measure the internal volume of the enclosure. We use Styrofoam peanuts. Once full, dump the peanuts into a cardboard box which can easily be measured since it is square, and then calculate your cubic footage for the subs. This method produces an enclosure 2.4 cubic feet. In a car it is difficult to make a box too big. Usually the problem is that a box is not big enough and it suffocates the subwoofers.
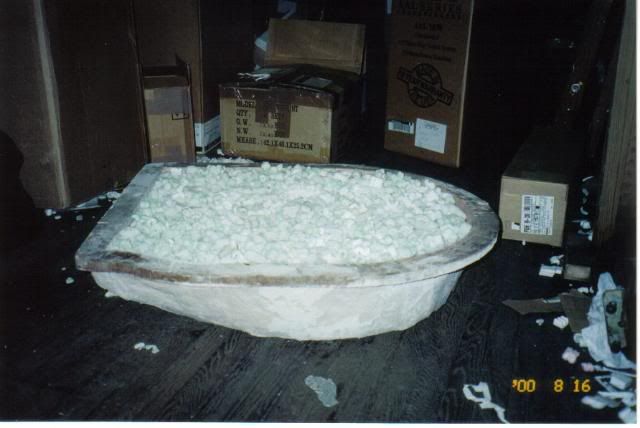
9. Begin sanding with 80 grit paper and a block or sponge to keep finger grooves from wearing into the project and creating waves. (Auto & Audio forced me to do this whole process by hand!) Gradually work your way up to 180 grit then 220 grit.
10. Apply a layer of Dolphin Glaze or Icing (thin weight body filler for finish sanding). Sand the enclosure smooth working your way up to 400 grit paper.
11. Primer the enclosure, sand it to remove any imperfections. The surface must be 100% flawless before paint. Paint will magnify any scratches, nicks, waves, etc.
12. Using ¾” Plexiglas for the baffle board, plot your speaker locations and use a router to obtain a perfect circle. Remember to measure the diameter of the speakers mounting size beforehand.
13. Drill and countersink holes for mounting screws.
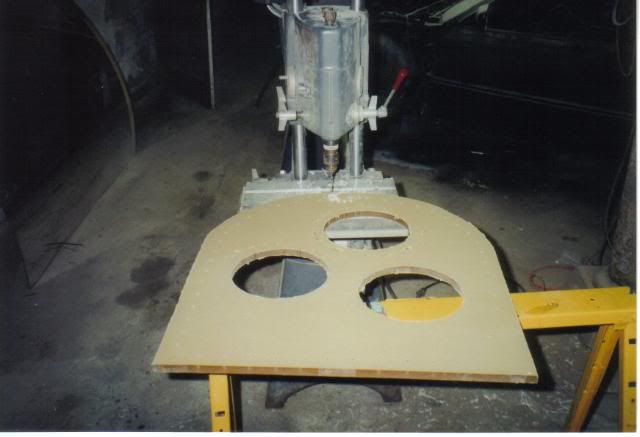
14. Mount the subs to the Plexiglas using nylock nuts and bolts to remain secure over time. Originally, my Plexiglas was tapped and machine screws held the subs in place. The first day I got my Concept amps, after using this enclosure for 7 years, the amps were so much more powerful that they ripped the screws out of the Plexiglas.
15. Use a layer of foam camper tape to seal the enclosure when the Plexiglas baffle is installed.
16. Use four 3/8” bolts to secure the enclosure to the car. The top border piece is located perfectly to secure bolts straight down through the frame rails of the car.
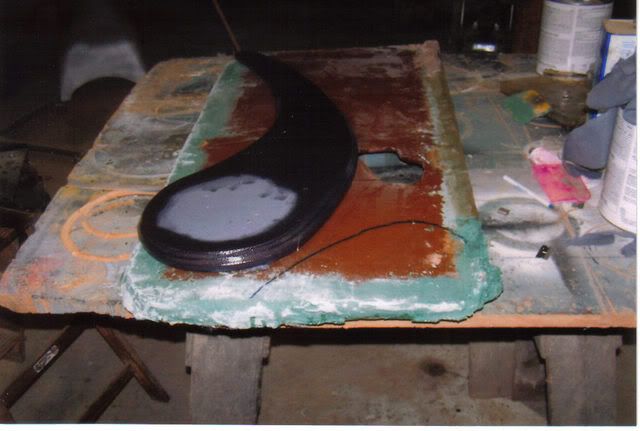
17. Construct a grille for the subwoofers. Plot the size and shape of your grille on ½” MDF wood. Cut everything out and router a second version. Fiberglass it to seal it up and protect it from water.
18. Router metal mesh for the top side of the grille piece and secure it with staples.
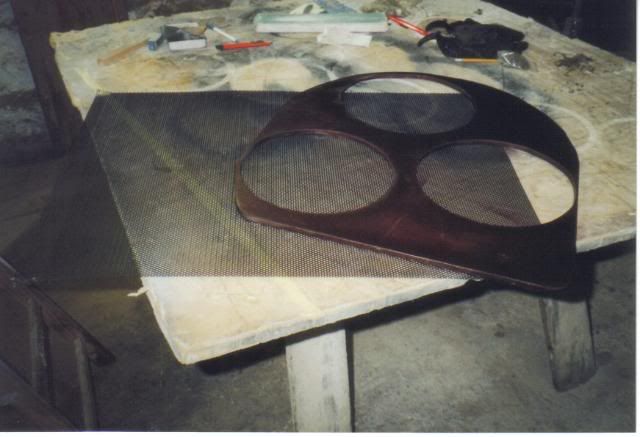
19. Upholster the top side and wrap it around the back securing with staples and spray glue.
20. Take your second piece that was routered out finish sand the bottom side and paint it. Attach it to its mate for a clean professional grille which looks good from the front or the back.
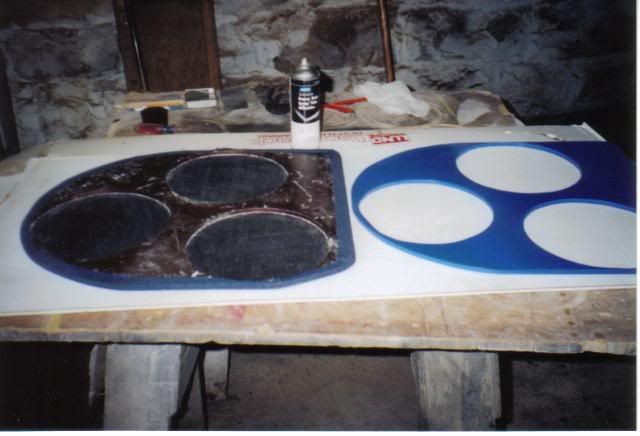
Here is the finished product.
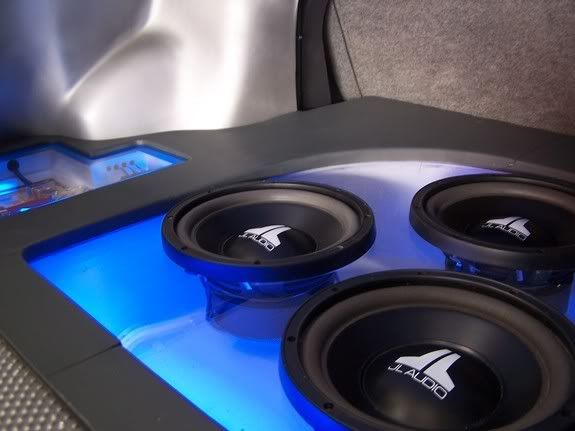 Trim Panels
Trunk Lid Panel
This method can be used for mounting a TV, or speakers in the trunk lid. Keep in mind my trunk lid is motorized so the additional weight did not require adjusting the torsion bars.
1. Cut out your shape. You can easily make a template out of paper or cardboard to do this.
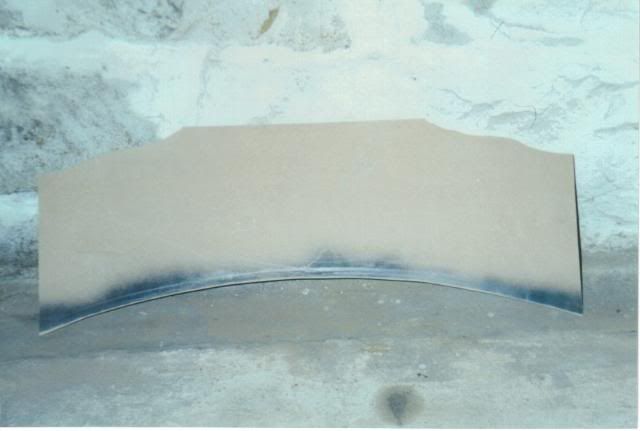
2. Build the box to house your TV the correct dimensions. This could easily become two circles if you want to aim and mount speakers.
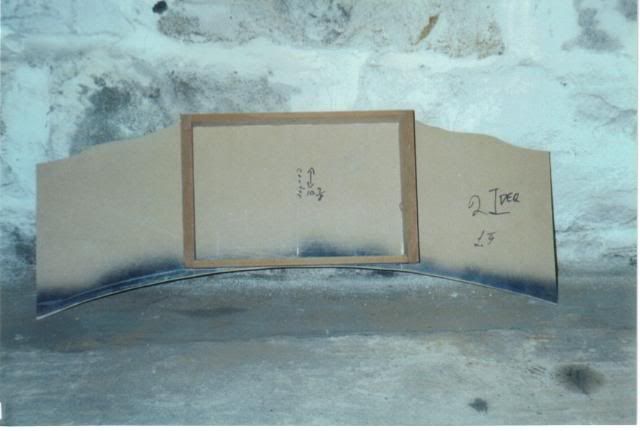
3. Stretch fleece tightly around the piece and staple to the back side, then fiberglass the project. Tip: router a 1/4” recess around the backside edge to allow for the addition of the glassed fleece. Keep the fleece stretched as tight as possible, you do not want it to sag when soaking it with the heavy fiberglass resin.
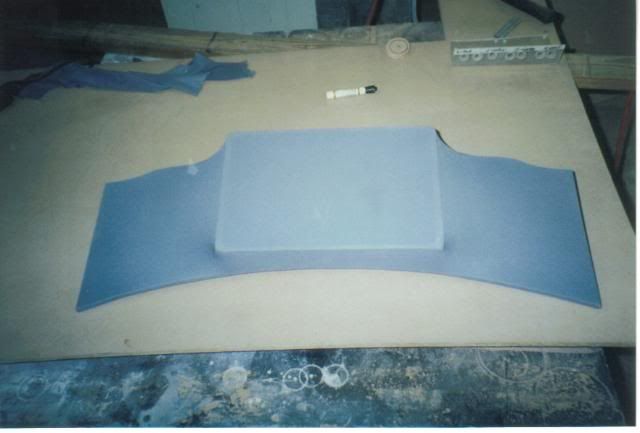
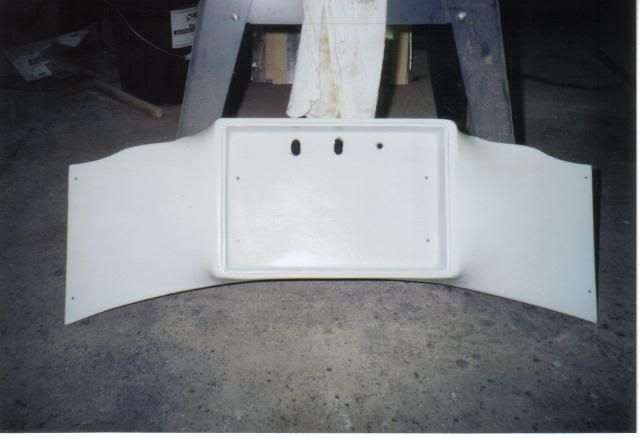
4. Drill holes for speaker wires or TV cables. Finish sand the project, prime it, and paint it.
 Side Trim Panels
Our cars have many shapes to the trunk's carpeted trim panels, so simply glassing them is not a show quality option.
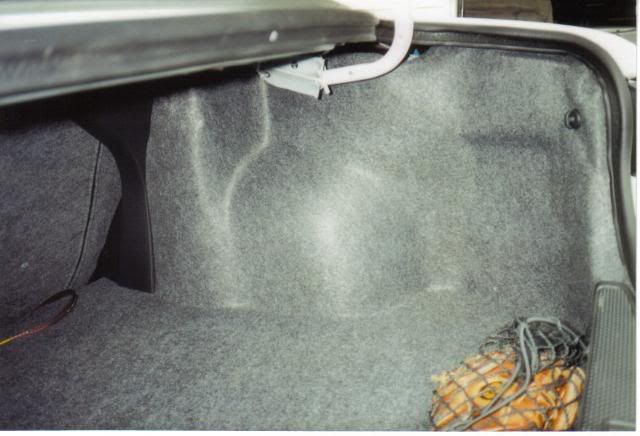
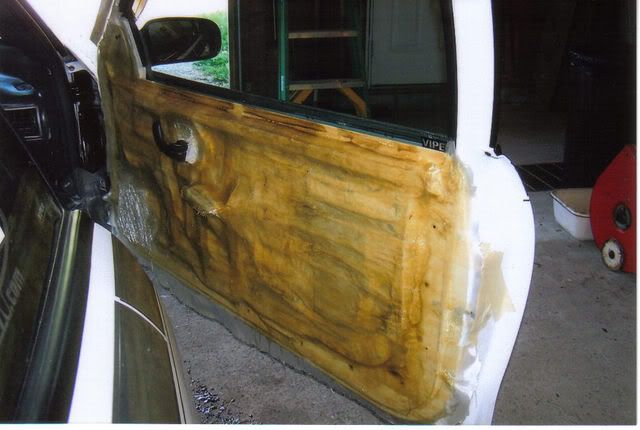
1. Lay down plastic to protect anything you do not want fiberglass on. It is also a good idea to mask off the edges of your weather-stripping.
2. Apply one layer of fiberglass resin to the trunks side wall carpets.
3. When the fiberglass has cured; remove your weather-stripping, apply fleece, reinstall the weather-stripping holding the fleece in place. Stretch the fleece as tightly as possible to get the desired look and staple the fleece to your fiberglassed carpet side panels.
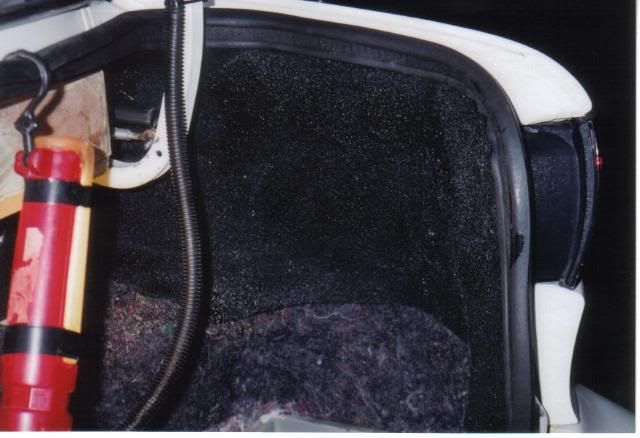
4. Scuff between coats and apply at least two more using fiberglass mat. Do this while the panel is still in the car so it does not warp.
5. When you are satisfied that the panel is dry, solid, and sturdy remove it from the car and begin sanding.
6. Apply a layer of body filler as smooth as possible. Work your way up in sandpaper grits.
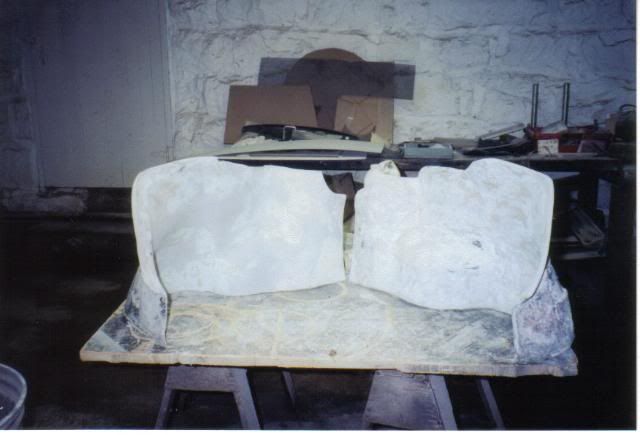
7. Apply a layer of Dolphin Glaze or Icing (thin weight body filler for finish sanding).
8. Sand the panel smooth working your way up to 400 grit paper.
9. Primer the panel, sand it to remove any imperfections. The surface must be 100% flawless before paint. Paint will magnify any scratches, nicks, waves, etc.
Here you can see the finished product.
 Rear Trim Panels
1. Using the plastic trim from the car and ½” MDF wood I constructed the rear trim for the trunk.
2. Use fleece to mate the rear panels into the curves of the side panels. Make sure you protect the side panels with plastic wrap or masking tape.
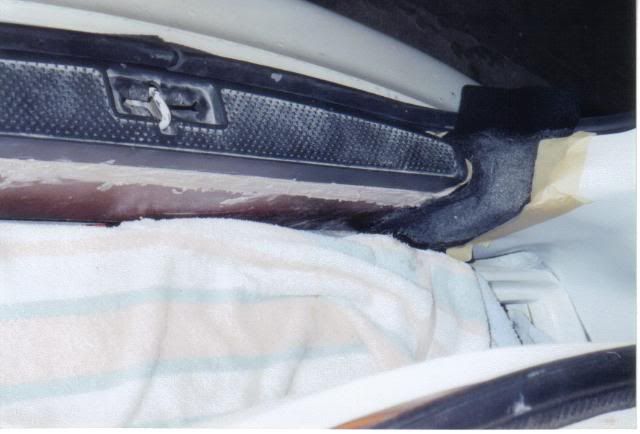
3. Use body filler and sand smooth. Avoid adding filler to the flat MDF wood, this was used for a smooth flat surface that will minimize elbow grease and time sanding.
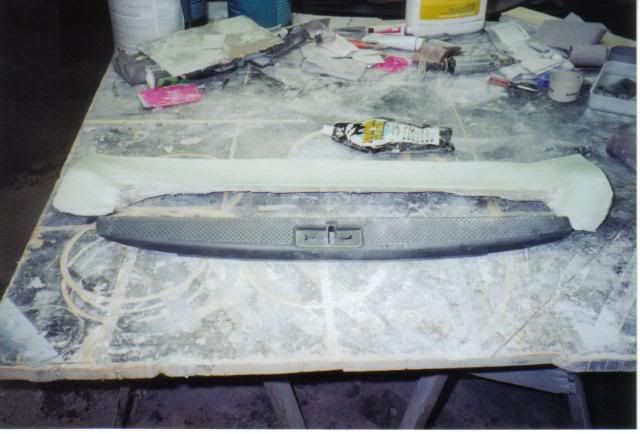
4. Apply a layer of Dolphin Glaze or Icing (thin weight body filler for finish sanding).
5. Sand the panel smooth working your way up to 400 grit paper.
6. Primer the panel, sand it to remove any imperfections. The surface must be 100% flawless before paint. Paint will magnify any scratches, nicks, waves, etc.
Floor Trim Panels
The beauty of the trunk is that all of the trim panels pressure fit one another into place solidly. There are no screws holding anything together. This allows for rapid access to any wiring or construction that the judges want to see at a show. The whole concept is made possible through the floor trim panels.
1. Using cardboard as a template I cut out the rough shape of the trunk floor.
2. Applying small sections of cardboard with tape I was able to fine tune all the little gaps to get the exact shape of the trunk floor without any gap anywhere.
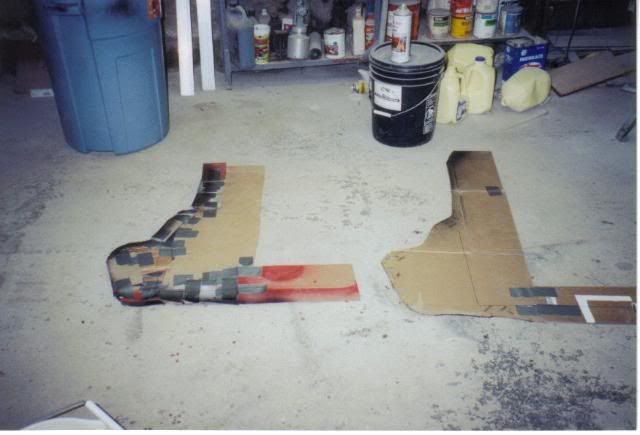
3. Trace the cardboard template onto ¾” MDF wood. Cut out the shape of the left side, right side, subwoofer enclosure, battery box, and crossover box (or whatever you are building in your car).
4. Router the battery box and crossover box holes to account for the ½” Plexiglas inserts.
5. Most importantly in the trunk's design; where the left side and right side mate together, router a channel for the two panels to interlock. The left side panel was routered on the bottom edge, and the right side panel was routered on the top edge. When installing the panels together the outward sides tip down into position, then I press the middle seam down to interlock the panels together which forces them tightly against the side panels, rear panel, and rear seat. The floor panels can not be removed unless the rear seat is folded down and I pull upward on the middle seam of the panels where they interlock.
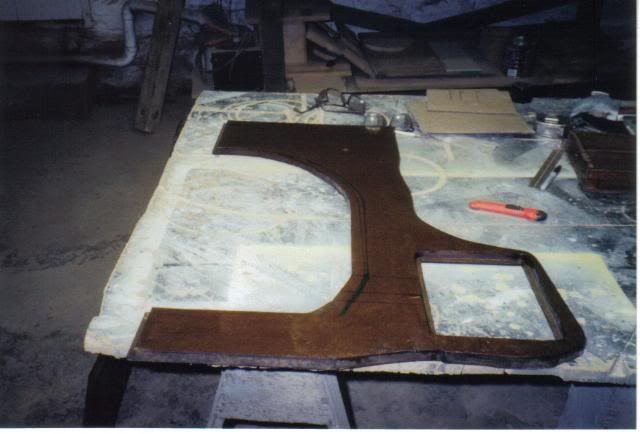
6. Upholster the panels or paint them the desired color.
Old Trunk
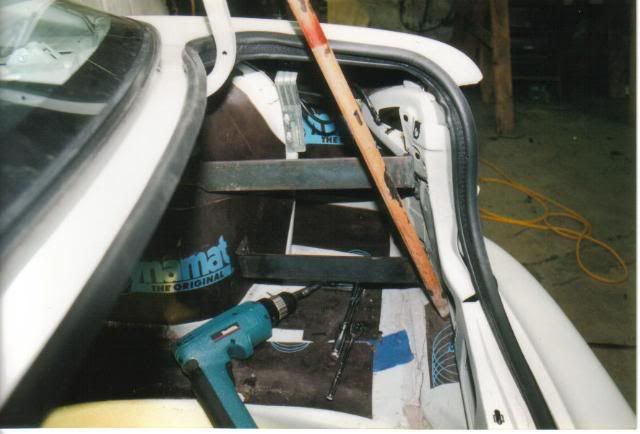
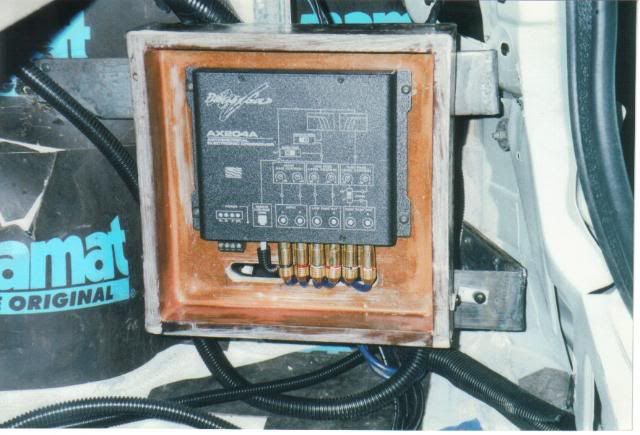
Here are some ideas from one of my old set-ups. You can see how I used solid metal brackets to mount fiberglassed enclosures to and how we made the trim panels from wood and body filler to smooth out the corners.
 Dash
Dash
*The steering wheel is not finished. It never ceases to amaze me that with an entirely custom built interior, the only thing people notice is that the steering wheel is cut off.
A few years ago at a major SLAP show in Hagerstown, Maryland I won second place. But not only did I lose to Keith Turner, I got beat bad. So on the way home I decided to start modifying the dash to make a bigger impression on the judges. I have built a couple versions now and my advice is: Do not build from scratch. Modify existing parts, cut them up and move them around, whatever. This will save you tons of time, and you will have perfect seams between panels, plus you can use factory bolts to reassemble everything. My first dash had too many flaws where panels did not line up perfectly enough to compete, which is why it has been rebuilt so many times to try and make it as perfect as possible (for my skill level at least).
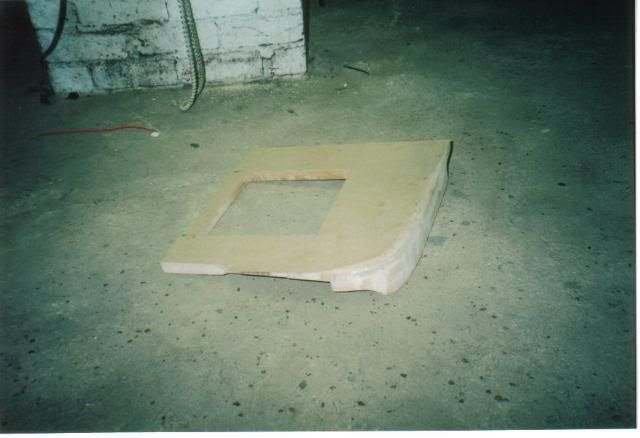
Here is the first dash I built, note how oversized our steering wheels are.
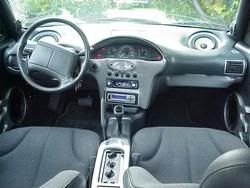
Here is the new dash.
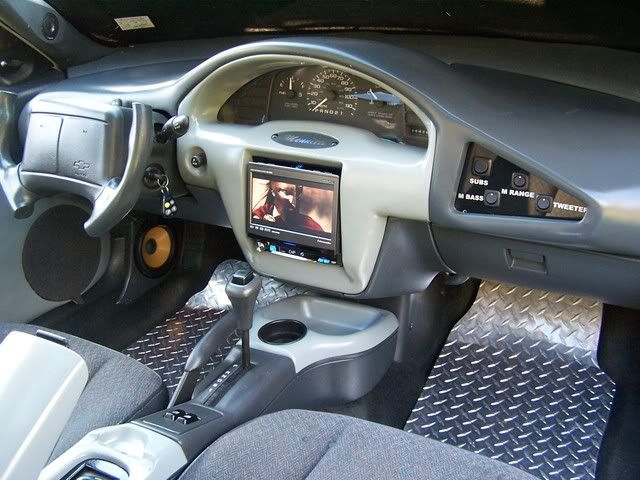
1. In order to retain a Cavalier feel, and try to make it look somewhat factory instead of wild and flashy, I used the stock base of the dash.
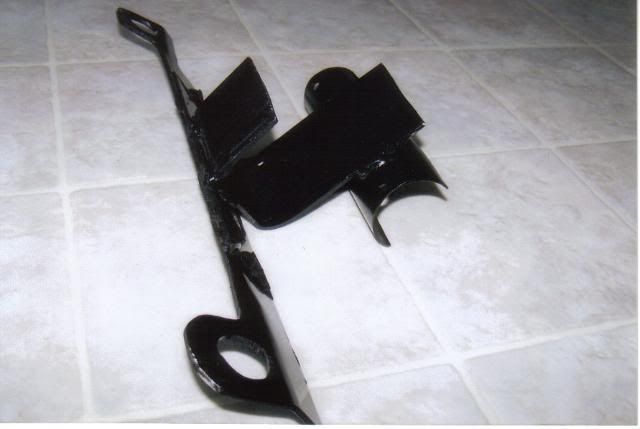
2. A metal bracket was used to mount the speedometer to the center of the dash. In the photo you can see how the rounded part of the bracket bolts to the metal brace inside the dash. The holes get fitted with the rubber grommets the speedometer sits in, and the bracket is angled for optimum viewing.
3. The top of the dash was stripped of its vinyl. Various pieces such as the rear tongue edge, vents, and speedometer hump were cut up and moved.
4. Trim for the speedometer, and the center radio trim section is bonded together using superglue and accelerant.
5. Shelving is constructed out of ¼” MDF wood to house the flip out DVD monitor (that will cleanly conceal everything when motorized up), computer system for the exterior light show, and system fusing. The HVAC system was relocated to the center console. The how to for this is in the Audio and Electronics forum
How To Relocating Your HVAC Controls.
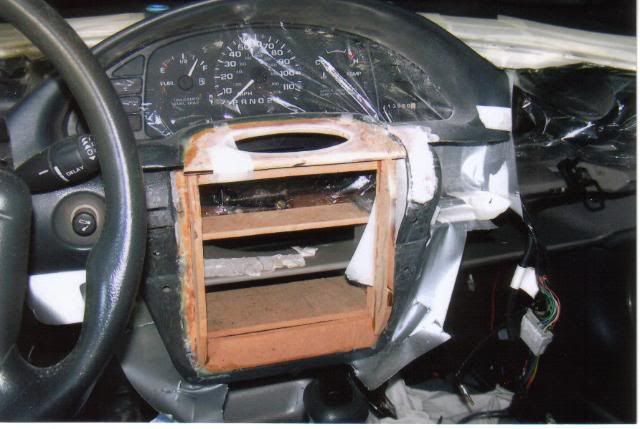
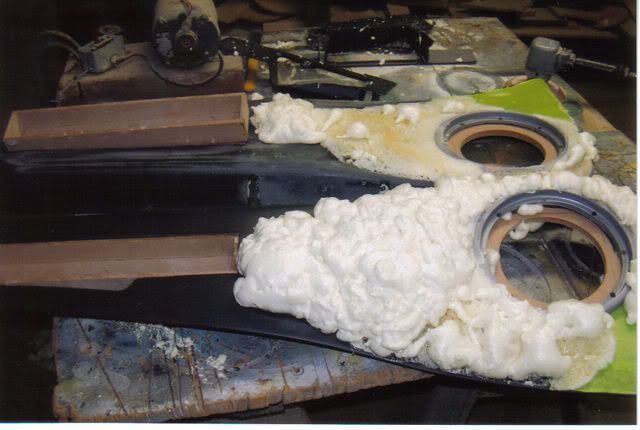
6. Expandable foam from Wal-Mart is sprayed where needed for sculpting. When dry this is hard foam that can be cut and sanded to any shape. It is a valuable tool when custom building contoured shapes to keep weight down from access body fillers.
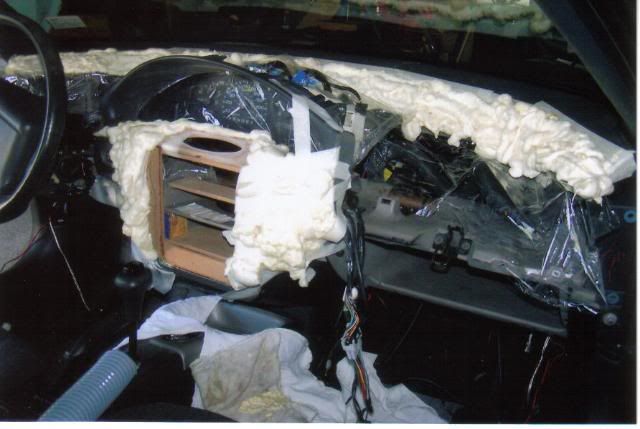
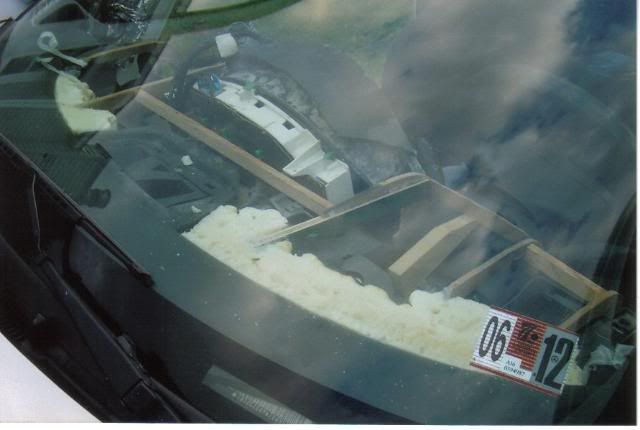
7. The dash must be strong enough to stretch fleece tightly across the dash to create the new shape. Ribs are constructed from wood to achieve a strong skeleton for the fleece. This picture shows the framework through the windshield on the driver’s side.
8. When sturdy, and everything is positioned exactly where you want it, stretch fleece across the new panel as tightly as possible securing with staples. You do not want the weight of the heavy fiberglass resin to sag the fleece when it is soaked through.
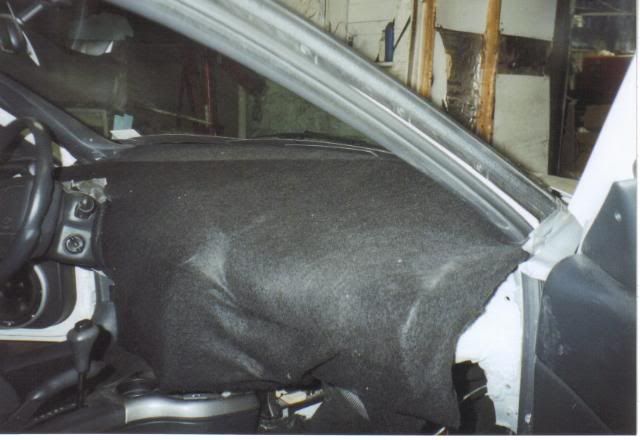
9. Protect your carpet and seats with plastic. Mask off the far end of the dash where the fleeced panel joins in near the windshield. It is also a good idea to take a minute and put a layer of Saran Wrap across the windshield. If you drip fiberglass onto a plastic panel just leave it dry, it will pop right off. If you try to wipe it up it will cause a mess.
10. Do as much work in the car as possible to avoid warping.
11. Scuff the fiberglass between coats to insure good adhesion of the next layer.
12. Add at least two more layers of fiberglass mat for a strong panel.
13. Carefully remove the panels. Scuff them up and apply a layer of body filler as smooth as possible.
14. For the radio’s trim I built an oval to showcase my name backlit by my alarm LED. After all, I have been doing all the work and I was tired of giving recognition to sponsors on my car.

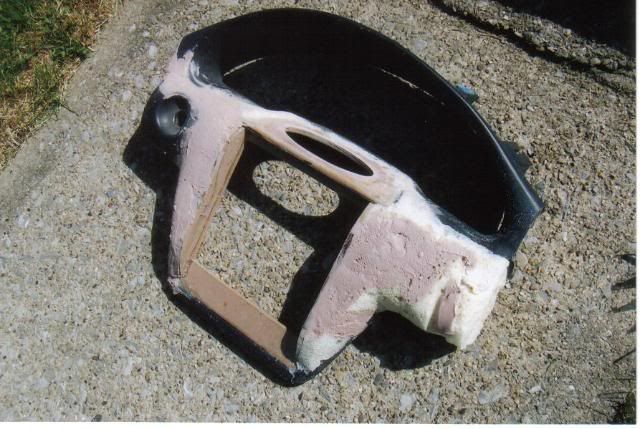
15. Apply a layer of Dolphin Glaze or Icing (thin weight body filler for finish sanding).
16. Sand the panels smooth working your way up to 400 grit paper.
17. Primer the panels, sand them to remove any imperfections. The surface must be 100% flawless before paint. Paint will magnify any scratches, nicks, waves, etc.
18. For switch panels and radio trim I used a piece of ½” Plexiglas. Paint the back side for a perfect glossy shine.
19. Have vinyl labels cut at your local shop. Apply a straight line of masking tape to help you add your labels perfectly even and level.
20. The triangular switch panel to the right of the speedometer controls the blue leads for each of my four amplifiers independently for tuning purposes. It has a cover panel upholstered in the same tweed as the seats for a show quality match.
Here is the finished product once again.
 Glove Box Switch Panel
From an old version of this car.
1. Using a piece of paper or cardboard trace the vertical side’s shape of your glove box. Measure the depth top and bottom of the sides. Plot these dimensions onto ½” MDF wood and cut them out.
2. Solidly brace these two sides by brad nailing cross members the appropriate width of the glove box to create your framework.
3. Stretch fleece across the face of the framework as tightly as possible and staple in place.
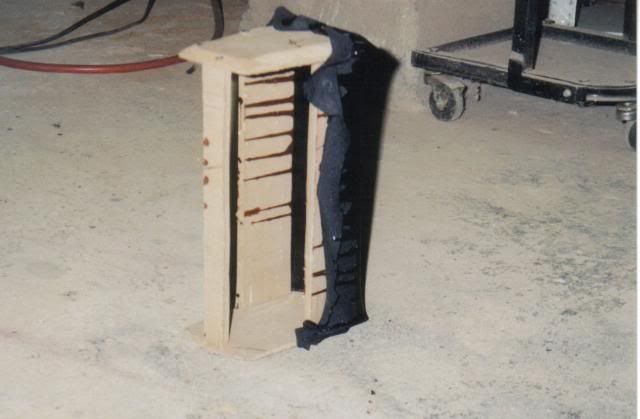
4. Fiberglass the entire piece to seal up the wood and to firm up the fleece.
5. Remove the panel.
6. Scuff up the face of the panel and apply a layer of body filler as smooth as possible.
7. Begin sanding with 80 grit and work your way up to 220.
8. Apply a layer of Dolphin Glaze or Icing (thin weight body filler for finish sanding).
9. Sand the panels smooth working your way up to 400 grit paper.
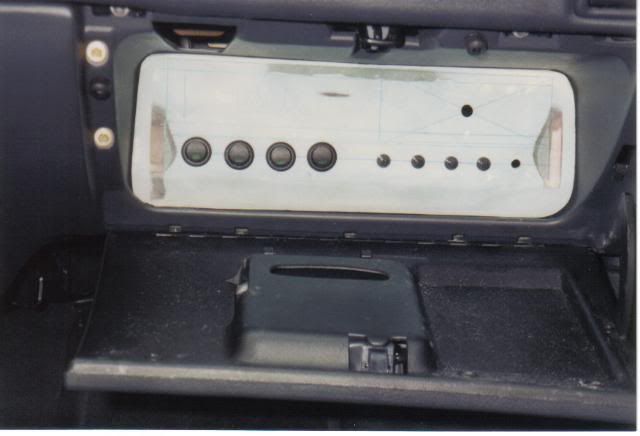
10. Use a soft tip marker to plot lines and calculate the position of your switches.
11. Drill a small pilot hole to ensure an even line of switches for the final product.
12. Test fit your switches.
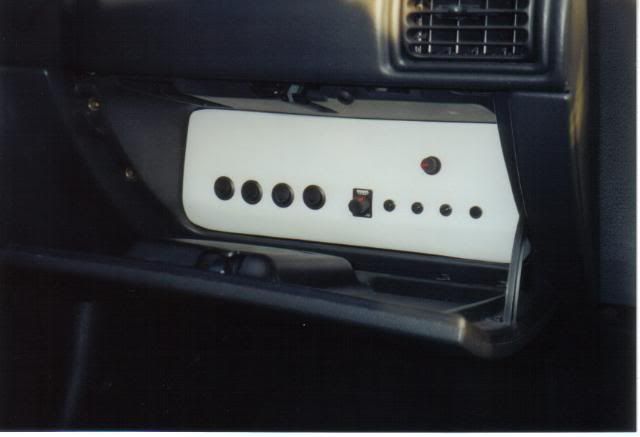
13. Primer the panels, sand them to remove any imperfections. The surface must be 100% flawless before paint. Paint will magnify any scratches, nicks, waves, etc.
14. Have vinyl labels cut at your local shop. Apply a straight line of masking tape to help you add your labels perfectly even and level.
Check out my other How To’s: Installing a Remote Car Starter, Motorizing your trunk lid, Adding/Relocating a battery to your trunk, Going from 9005/9006 to 9007 bulbs (converting your headlights into 2K with OEM functions), etc.
For additional resources go to Steve Brown University online for Alpine demo vehicle builds, or check the pros at HzEmAll.com

^CLICK ME TO SEE HOW I BUILT EVERYTHING^ How To in Interior Forum


