HOW TO remove door panel/window crank (56-ok pics) - Interior Forum

Forum Post / Reply
You must log in before you can post or reply to messages.
HOW TO remove door panel/window crank (56-ok pics)
Wednesday, June 15, 2005 9:25 AM
HOW TO: Remove door panels, window crank
By: David Everett, neo32843

All too often do we get the wave of "How do I get the crank off?" threads. I took a whole 3 minutes today to make this quick how-to, and it covers the complete door panel removal for a 3rd gen with window cranks and manual mirror adjusters.

This is a bit of an expansion to what Raptor has posted in his FAQ.


> First, we must remove the window crank. There is a c-clip that holds it on. To do this, get a washcloth or some other small cloth. Wedge it behind the handle side of the crank, between the crank and the black washer.


> Now, grab one of the lower corners of the rag and give it a good jerk straight down. If the c-clip doesnt come off, try again.

NOTE: The c-clips tend to fly, so make sure you find it ASAP. Leave this c-clip off the crank until told to put it back on.

> Next we have to remove the panel behind the mirror. There is one screw to remove, right on the front of the panel. Then this peice slides off the adjuster arm.


> Now remove all the screws around the perimeter of the door AND the two inside the handle, everyone seems to forget those.

> Using your window crank (without the c-clip) roll the window all the way down. This makes it easier to work.

> Now do what we all love... Pull. Start at the bottom, I suggest using the in-door bucket to pull against. There are also plastic clips behind the panel, its ok to pull. If you feel too much resistence ensure you have not missed a screw.


> Once you get the panel released, it must be moved upwards to be removed, because it has a lip the goes towards the window and wraps the body.

> And it's off!


Now we get to put it back together...

> Put the door panel back on, starting at the top. The top lip needs to go behind the body (towards the window). This part can be tricky. Try starting at the front and working back.

> Now push in all the clips. Sometimes they bend so make sure they are lined up with their holes. Replace the screws.

> Now replace the peice that goes behind the mirror. The is a small lip the needs to go behind the door panel. And replace the screw.

> The window can be rolled up now, using the crank (still without the c-clip replaced).

> Hold the crank facing away from you, handle side down. The c-clip needs to loop over the top. Some people find it easier to start on one side and wrap it around, while I find it easier just to push it straight on from the top.


> Put the washer back on your crank shaft. The "dented" side towards the door panel.


> Hold the crank over the shaft at the position you want it to be. Push it on when you get it where you want it.

NOTE: The shaft is ridged, these ridges match up with rifges inside the crank handle. If the crank doesn't simply snap on, you dont have them lined up. Wiggle it a little bit and it will go.

> And it's on!


-- The The One One --
<IMG SRC="http://registry.gmenthusiast.com/images/neo32843/personal_pic.gif">

Re: HOW TO remove door panel/window crank (56-ok pics)
Wednesday, June 15, 2005 11:01 AM
Hmmm, thats awesome. Simple enough for me to paint my doors this week!!!

Thanks
Re: HOW TO remove door panel/window crank (56-ok pics)
Wednesday, June 15, 2005 2:44 PM
Now that is how a sticky should be made.....WITH pics....


Life Is Ours, We Live It OUR Way.>Metallica
Re: HOW TO remove door panel/window crank (56-ok p
Wednesday, June 15, 2005 5:13 PM
Re: HOW TO remove door panel/window crank (56-ok p
Wednesday, June 15, 2005 6:01 PM
BTW... Im not sure if these directions will work on a 1st or 2nd Gen...

The directions should be similiar on cars that have power windows or mirrors, you just have to work around the wires once you get the panel off, although I beleive they unplug...?


-- The The One One --
<img src="http://registry.gmenthusiast.com/images/neo32843/personal_pic.jpg">
Re: HOW TO remove door panel/window crank (56-ok p
Wednesday, June 15, 2005 8:05 PM
Quote:

Did he say sticky?

Yes
and I second for the people who don't understand text and need pictures along with


<img src=http://www.mclonedogmcwad.com/sig3.jpg>
Please visit <a href="http://www.mclonedogmcwad.com">mclonedogmcwad.com</a> and <a href="http://www.realmofexcursion.com/main.html">RealmofExcursion</a>
Re: HOW TO remove door panel/window crank (56-ok p
Wednesday, June 15, 2005 8:21 PM
Good Info with Pics!!!

Sticky!! Sticky!! Sticky!!


98 Z24

RIP Specks
Re: HOW TO remove door panel/window crank (56-ok p
Thursday, June 16, 2005 12:02 PM
Sticky please
Re: HOW TO remove door panel/window crank (56-ok p
Thursday, June 16, 2005 3:36 PM
lol, I should of read this before I took a crank off with a screw driver and scratched up the panel a bit.


._____________________________.
Causa latet vis est notissima

DIY Clear 03+ Headlights


Re: HOW TO remove door panel/window crank (56-ok p
Thursday, June 16, 2005 6:01 PM
actually, there shoudl be some added to this, power locks plays a big part part in removing, at least on a sunfire.


"Official Jewish J-Body"
Re: HOW TO remove door panel/window crank (56-ok p
Thursday, June 16, 2005 6:41 PM
HECK YEAH .... that worked awesome


Re: HOW TO remove door panel/window crank (56-ok p
Thursday, June 16, 2005 7:24 PM
I checked the post one-day too late.
I just gutted my interior yesterday. Tried the washrag trick about three times( a la chiltons). wasn't working, but my boxcutter did. lol. I circled the black washer behind the handle with the boxcutter until the handle slid through the door. Probably not the cleanest demo ever done, but sucessful.

Good job on the right way to do it.
Re: HOW TO remove door panel/window crank (56-ok p
Thursday, June 16, 2005 8:10 PM
Machzel08 wrote:actually, there shoudl be some added to this, power locks plays a big part part in removing, at least on a sunfire.


neo32843 wrote:The directions should be similiar on cars that have power windows or mirrors, you just have to work around the wires once you get the panel off, although I beleive they unplug...?


Yeah... if you wanna write it up go for it... I quite obviously dont have a sunfire with power locks


<img src="http://registry.gmenthusiast.com/images/neo32843/personal_pic.jpg">
<A HREF="http://www.neo-j.741.com/">Visit my Website: neo-j.741.com</A>
Re: HOW TO remove door panel/window crank (56-ok p
Friday, June 17, 2005 4:04 AM
Nice How To. I just did my door speakers last week, and could used it, but found some good info on Team Forward Motion. For those with the power windows, simply remove the panel with the window switches in place, and disconnect the plugs from behind. I found out the hard way not to pry the window switch out from the front. Nice post though. Now if someone would make a post with pics for removing the back dash, that would be awesome.


Gotta keep on livin', L-I-V-I-N
Re: HOW TO remove door panel/window crank (56-ok p
Friday, June 17, 2005 4:16 AM
There is a tool made to remove window cranks can get at any parts store http://www.cardomain.com/item/SOU87600
Re: HOW TO remove door panel/window crank (56-ok p
Friday, June 17, 2005 9:51 AM
neo32843 (The The One One) wrote:
Machzel08 wrote:actually, there shoudl be some added to this, power locks plays a big part part in removing, at least on a sunfire.


neo32843 wrote:The directions should be similiar on cars that have power windows or mirrors, you just have to work around the wires once you get the panel off, although I beleive they unplug...?


Yeah... if you wanna write it up go for it... I quite obviously dont have a sunfire with power locks

i would be glad to but i cant do it till monday maybe. i'll post it up later
Z24Taz wrote:There is a tool made to remove window cranks can get at any parts store http://www.cardomain.com/item/SOU87600

yes but that tool costs money. a rag is free or daman near close to it


"Official Jewish J-Body"
Re: HOW TO remove door panel/window crank (56-ok p
Saturday, June 25, 2005 9:42 PM
Does this mean I dont get my sticky?


hello
NEO WAS HERE
I have become too lazy to create a new sig.
you're reading my line-break
<A HREF="http://www.neo-j.741.com/">Check my website</A>
Re: HOW TO remove door panel/window crank (56-ok p
Saturday, June 25, 2005 9:55 PM
that tool costs 5 dollars at most.. and it is a whole lot easier than a rag


Re: HOW TO remove door panel/window crank (56-ok p
Sunday, June 26, 2005 8:31 PM
The tool isn't that much, agreed. But for on-the-fly, out-of-shop, or for ppl who dont want to spend the money for a one-time deal, a rag works.

The tool is handy if you think you'll have your panels off more then a few times it wouldn't hurt to pick one up.


hello
NEO WAS HERE
I have become too lazy to create a new sig.
you're reading my line-break
<A HREF="http://www.neo-j.741.com/">Check my website</A>
Re: HOW TO remove door panel/window crank (56-ok p
Monday, June 27, 2005 5:30 AM
ive got the tool and ive been using the towel most recently, once you learn how to get it off. it can be done quicker with the towel. what i like about the towel is most of the time the c-clip will stick to the threads in the towel and not just pop off like with the tool. they both work and both are cheap.


http://www.flickr.com/photos/sndsgood/ https://www.facebook.com/#!/Square1Photography
Re: HOW TO remove door panel/window crank (56-ok p
Monday, June 27, 2005 7:34 AM
Or you can use a fork, bend the two middle prongs off and use that.


Re: HOW TO remove door panel/window crank (56-ok p
Monday, June 27, 2005 8:17 AM
^^ One of your forks...


hello
NEO WAS HERE
I have become too lazy to create a new sig.
you're reading my line-break
<A HREF="http://www.neo-j.741.com/">Check my website</A>
Re: HOW TO remove door panel/window crank (56-ok p
Tuesday, June 28, 2005 11:25 PM
05 sunfires... rag doesnt work. i took it to the dealer and the service guy was stumped when his rag couldnt pop it off. you need the tool.

STICKY!!!!! STICKY!!!! NOW!


Re: HOW TO remove door panel/window crank (56-ok p
Thursday, June 30, 2005 12:26 PM
Well i've been on the Org for awhile now so it's about time i write a tutorial on something. Sorry if it's insanely in depth
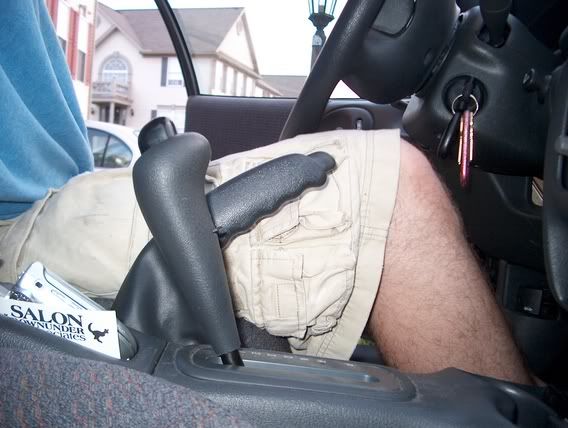
First off is how to install a new shifter for an automatic. I was tired of the giant dildo GM chose to use and i like the idea of a side button shifter.
Put your foot on the brake and turn the key until you can move the shifter. Put it all the way back into [1].

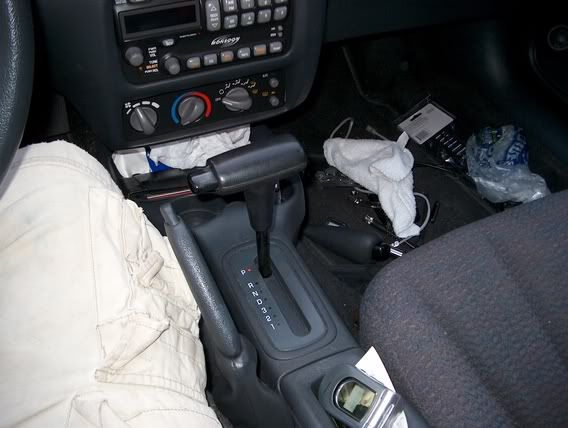
Take a small flat head screw driver and wedge it into the notch and pry the "staple" out.

now pull your shifter up. this is what you'll see.

Now at this point you can cut your shifter if you choose. Just make
sure that you cut the yellow inner stick just slightly taller than the outer metal. otherwise the button won't press.
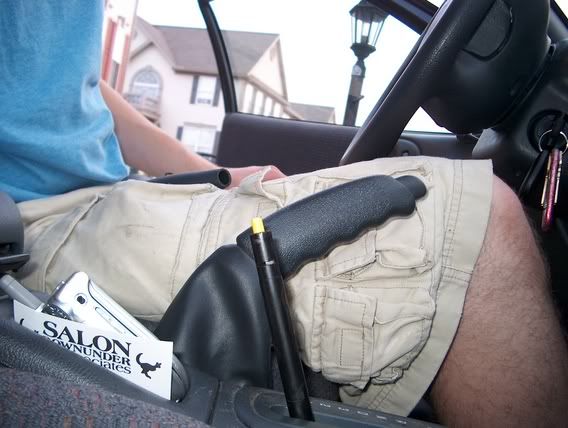
Now just push on your new shifter and push the staple in.

Finished.
Next is is how to remove the door panel on a Sunfire. the car i used (mine) was an 01 w/ power locks and manual windows so if something varies
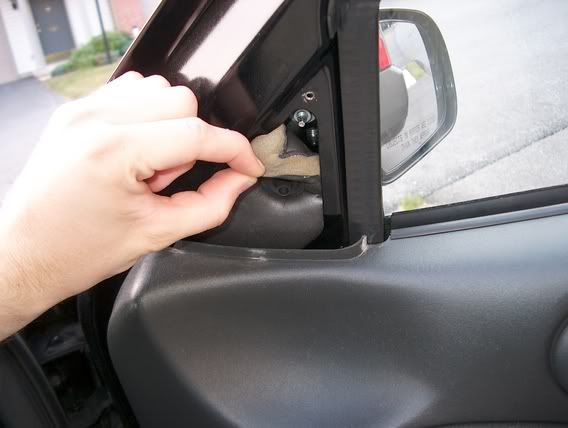
from yours slightly just accomodate. take off the interior panel on your mirrors.

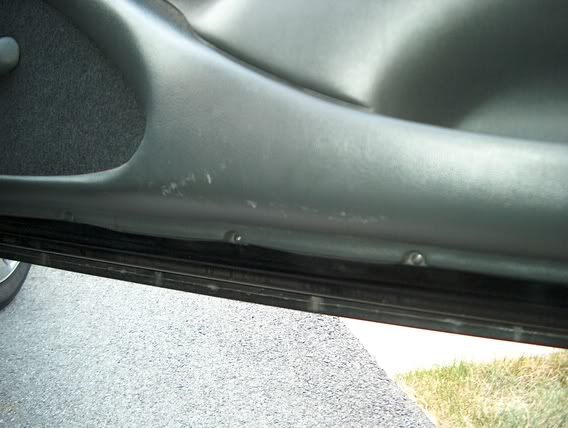
Next, remove the 3 philips head screws
from the bottom for the door panel and the 1 on the bottom corner.

Then remove the two 7mm bolts underneath the door handle.
.
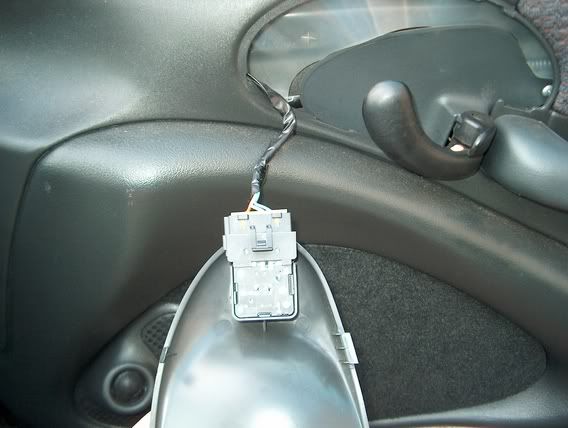
You can choose to remove the power locks by pulling here

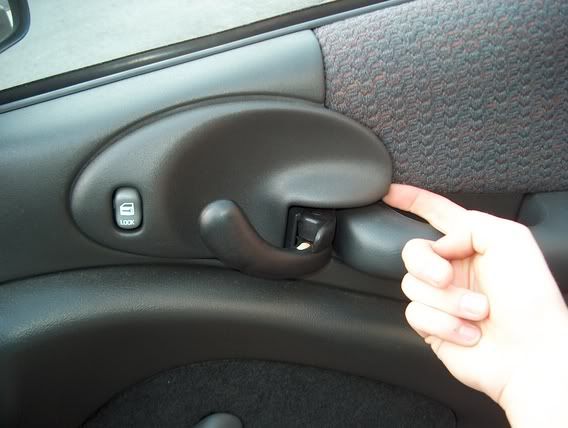
and disconnect it, this step makes it easy but it is not required.

Next, take a rag and slide it down between your door and your window crank (yes there is a special tool that does this but that costs money)
jerk both sides for the rag down form the handle. rotate the handle to the left a little then to the right, now jerk down again,
hold the rag tight and turn the handle left, around until the clip pops out

now just pull the panel off with some force.
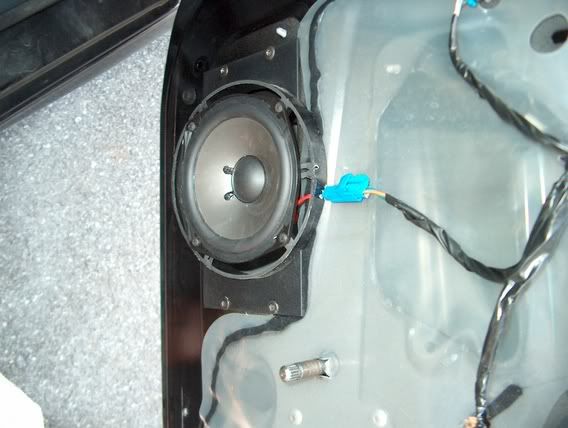
the tweeter pod in the door can be removed with a 10mm socket.

Go slowly and carefully, why you ask? well out of the 4 per side
I have a toal of 5 plastic screws left. a .75" tweeter fits very nicely in place of the stock one. Here is where the stock 4x6s
go (I have replaced them with 5.25" JL components).

To put the door back on just repeat all of these steps in reverse except for
the window crank. Put the omega clip slightly in the handle and and put the handle on the door(be sure to put the black ring in
first). Now slight the omega clip down with a screwdriver.
Finished.
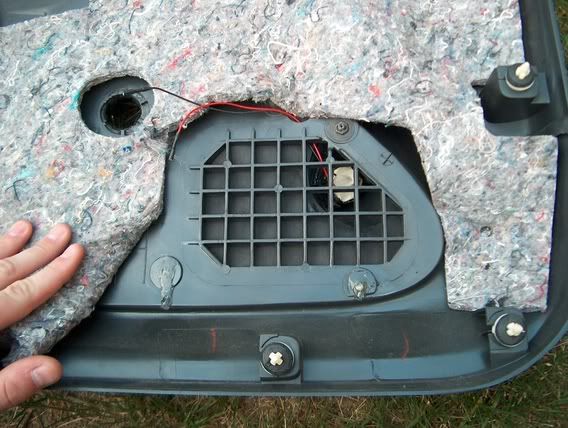
And finally, for those of you, like me, who want to swtich to power mirros. You are in luck, to my knowledge sunfires come prewired
for power mirrors. right here
.
Follow the above instructions to remove the door panel. then pull the foam from out of the
cavity
.
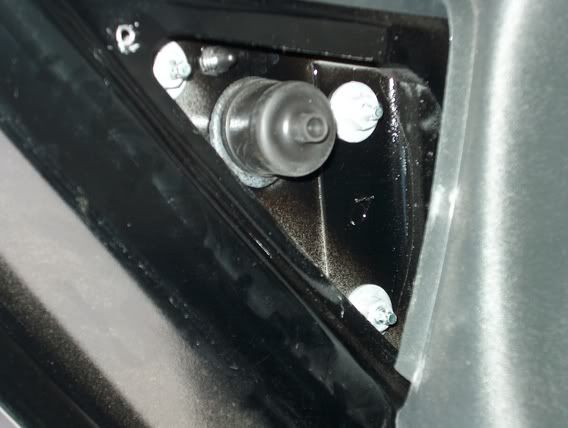
now remove the 3 10mm bolts

Once the bolts are off just go on the outside and pull, it has adhesive so it will
need some elbow grease.
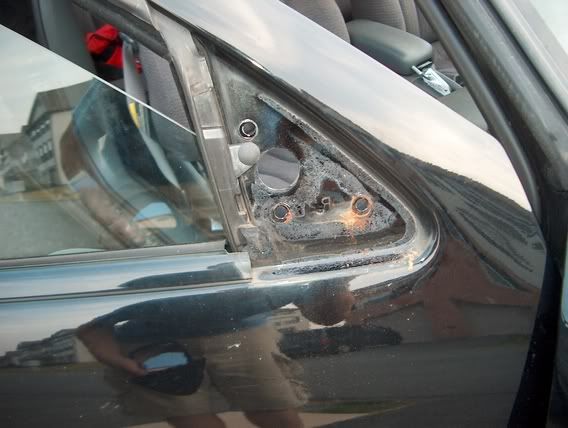
.
now that you have the old mirror removed
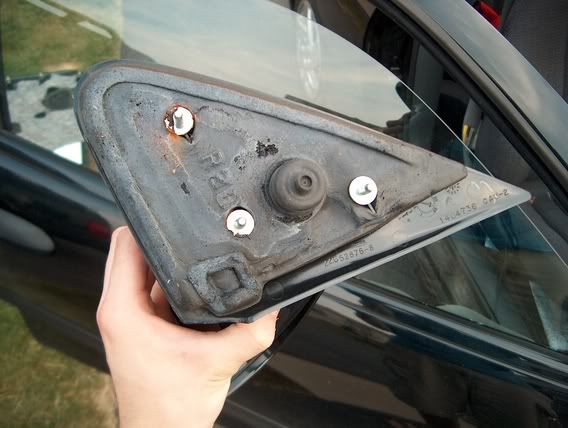
put the new one on[
IMG]http://i6.photobucket.com/albums/y207/machzel08/passmirror.jpg[/IMG]
and tighten down the bolts.
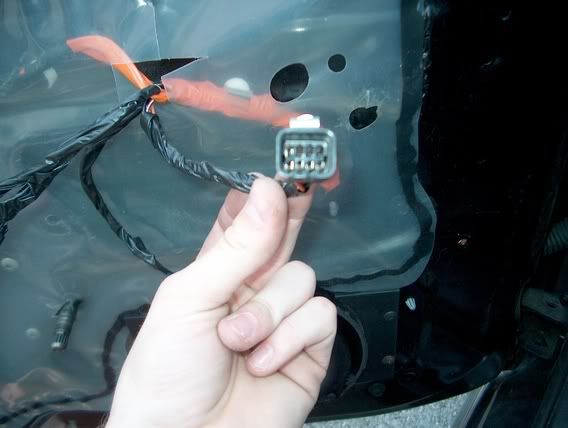
connector on the pass. side is a 4-pin connector but only has three wires in it.

the drivers side is an 8-pin connector and has 5 wires in it.

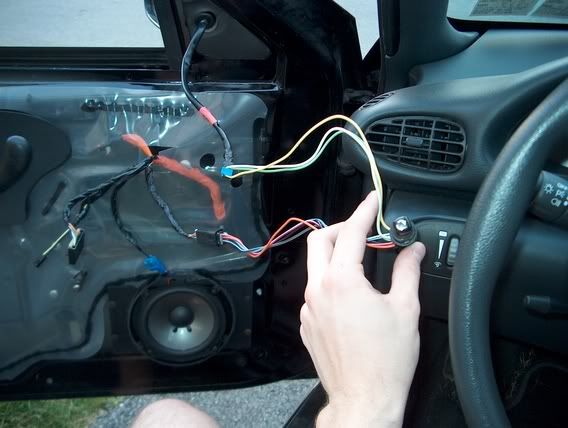
Now just hook up the controller. this goes in betweeen the drivers side mirror and the jack in the door.

Put every thing back together. Finished.
I think i covered everything.


"Official Jewish J-Body"
Re: HOW TO remove door panel/window crank (56-ok p
Thursday, June 30, 2005 6:28 PM
^^ Thanks for jacking my thread?


You're reading my line-break, you are a loser.

Forum Post / Reply
You must log in before you can post or reply to messages.


Start New Topic Advanced Search